Managing vStack virtual machines

In cloud computing, vStack is a robust and versatile platform that is a hyper-converged infrastructure (HCI) solution. vStack integrates compute, storage and networking into a single system, and provides a full range of virtual machine (VM) management capabilities.
Managing virtual machines in a cloud environment is critical to optimizing resource utilization, ensuring data security and maintaining system performance. With vStack, users have the flexibility to customize their virtual machines to meet specific needs, from choosing an operating system to defining CPU and RAM resources and selecting a storage pool.
In this guide, we will take a detailed look at the process of creating, modifying, and managing virtual machines in vStack.
Introduction to managing VMs in vStack
A virtual machine (VM) is an aggregated entity that combines three key resources of a cluster: SDS, SDN, SDC. A VM has the following properties:
- CPU / RAM of the VM is provided by CPU / RAM resources of a particular Node;
- VM disks are provided by one specific Pool;
Since the VM is an aggregate entity, its provisioning is done automatically due to the provisioning of any of the layers on a particular Node.
VM management is performed through a single system management interface, where the user can work with new and already created VMs. The vStack platform provides users with the following features:
- create a VM;
- starting, stopping, and restarting a VM;
- modification of VM;
- creating VM snapshots and rolling back to these snapshots;
- deleting VMs;
The VM console and the ability to use recovery media are also available to users.
Creating a VM
To create a new VM, perform the following steps:
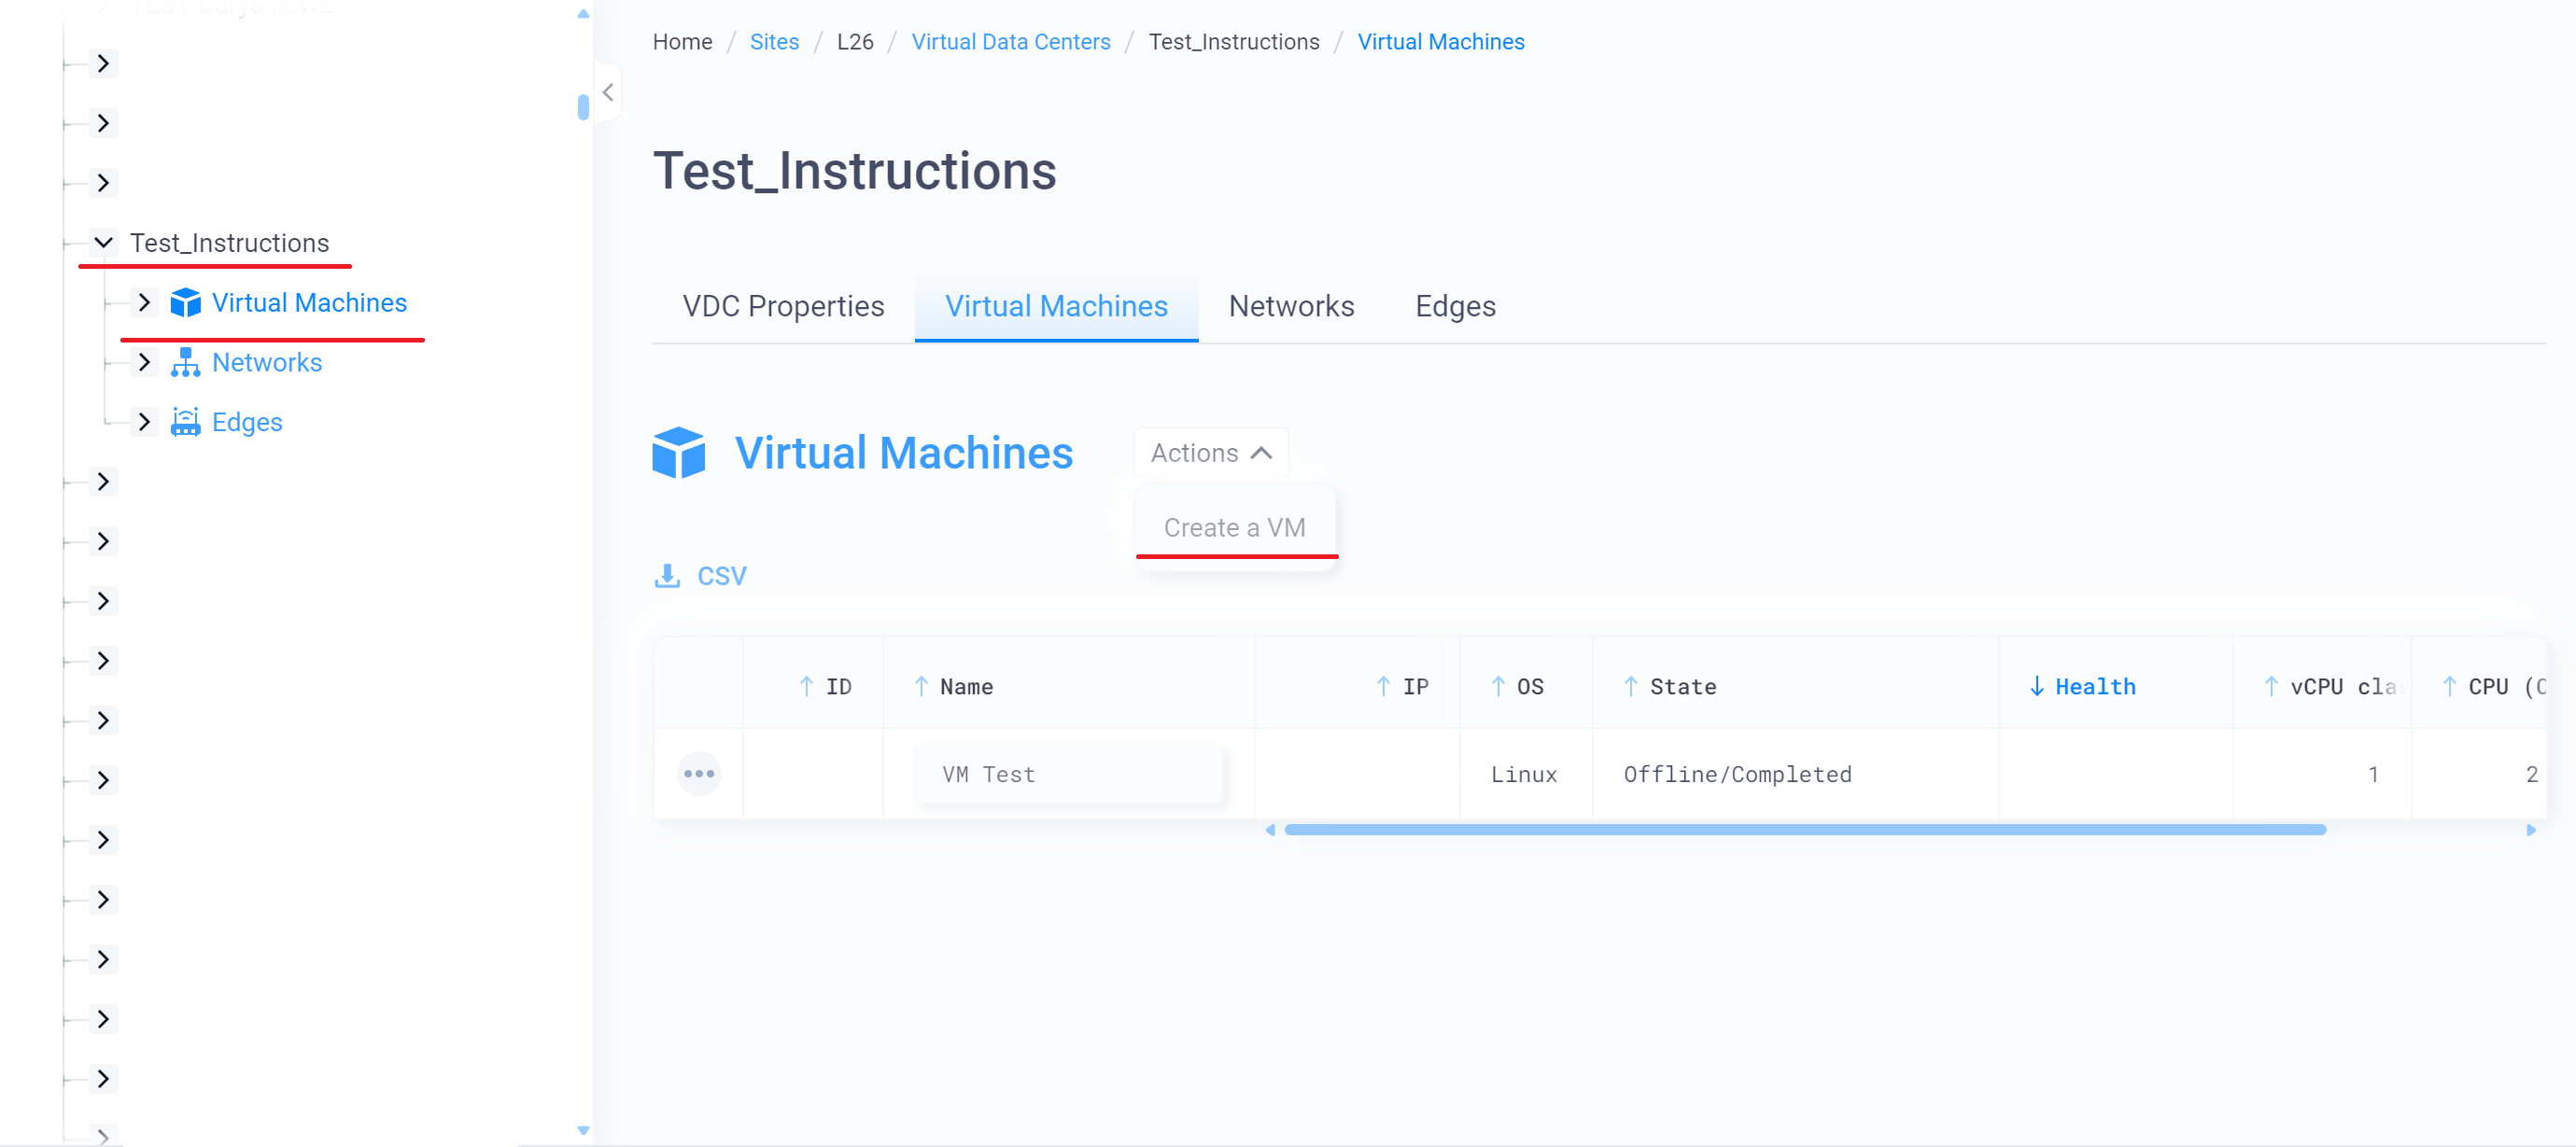
1. Click the arrow to the left of the name of the data center where you want to create the VM to display the Virtual Machines and Networks tabs.
2. Click the Virtual Machines tab of the virtual datacenter in which you want to create the VM.
3. Next, click the Actions drop-down list and select Create VM.
4. Fill in the basic information about the VM:
- the name of the VM;
- type of operating system (OS) – Linux, FreeBSD, Windows;
- OS template – choose a suitable one from the list;
- brief description of the VM (optional);
- VDC (if necessary) – by default select the VDC in which the VM is created;
- Automatic or explicit pool selector:
– smallest space;
– smallest CPU;
– smallest RAM;
– pools (in our case z01-z05).
- number of CPU cores;
- number of RAM (in GB).
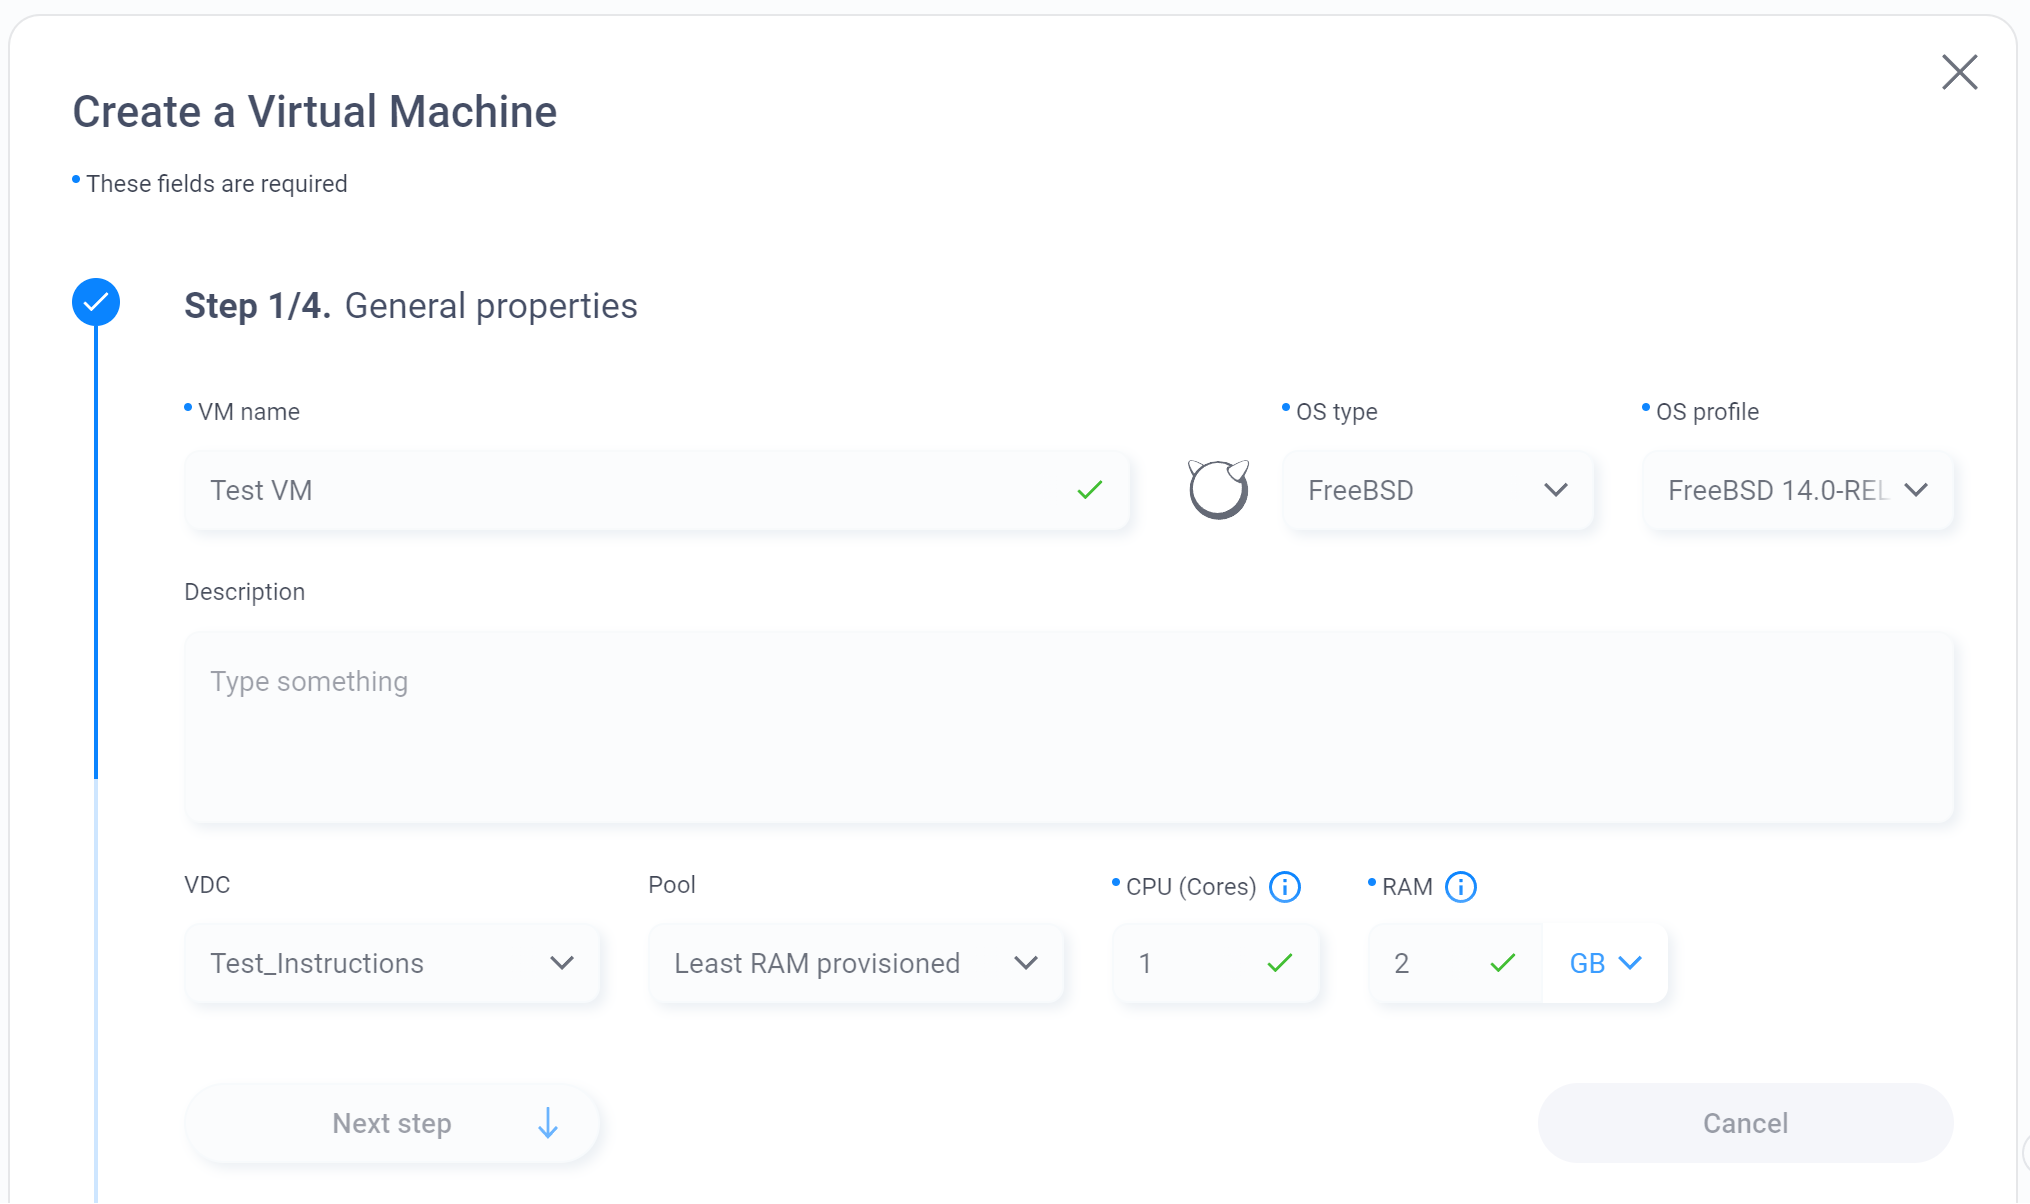
5. When all the information is filled in, you can move on to the next step by clicking on the Next Step button.
Fill in the VM’s disk information:
- disk name (optional);
- slot (order of disk visibility in the guest OS);
- disk size (GB);
- disk physical sector size (512 by default);
- throughput limitation in IOPS (optional);
- throughput limitation in MB (optional);
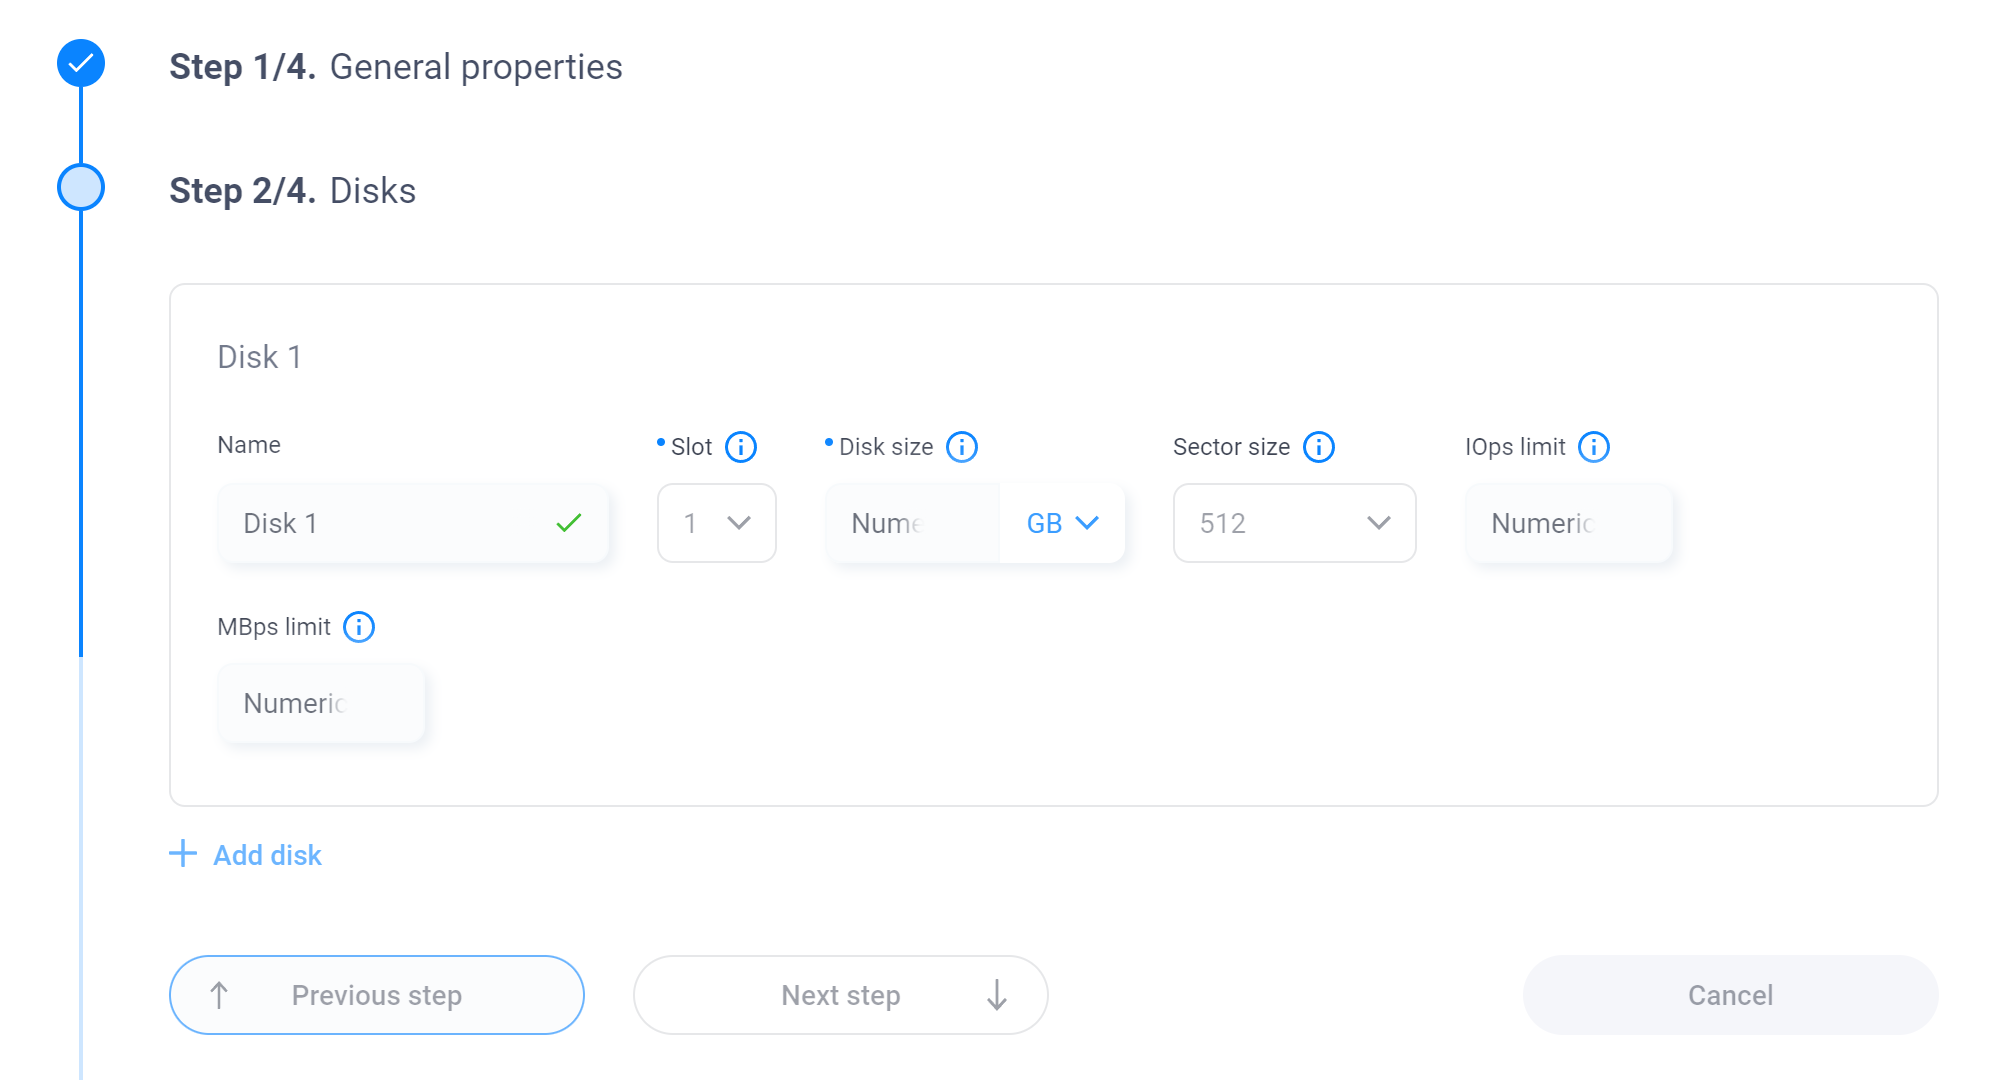
You can also add a new disk. The total number of VM disks cannot be more than 5.
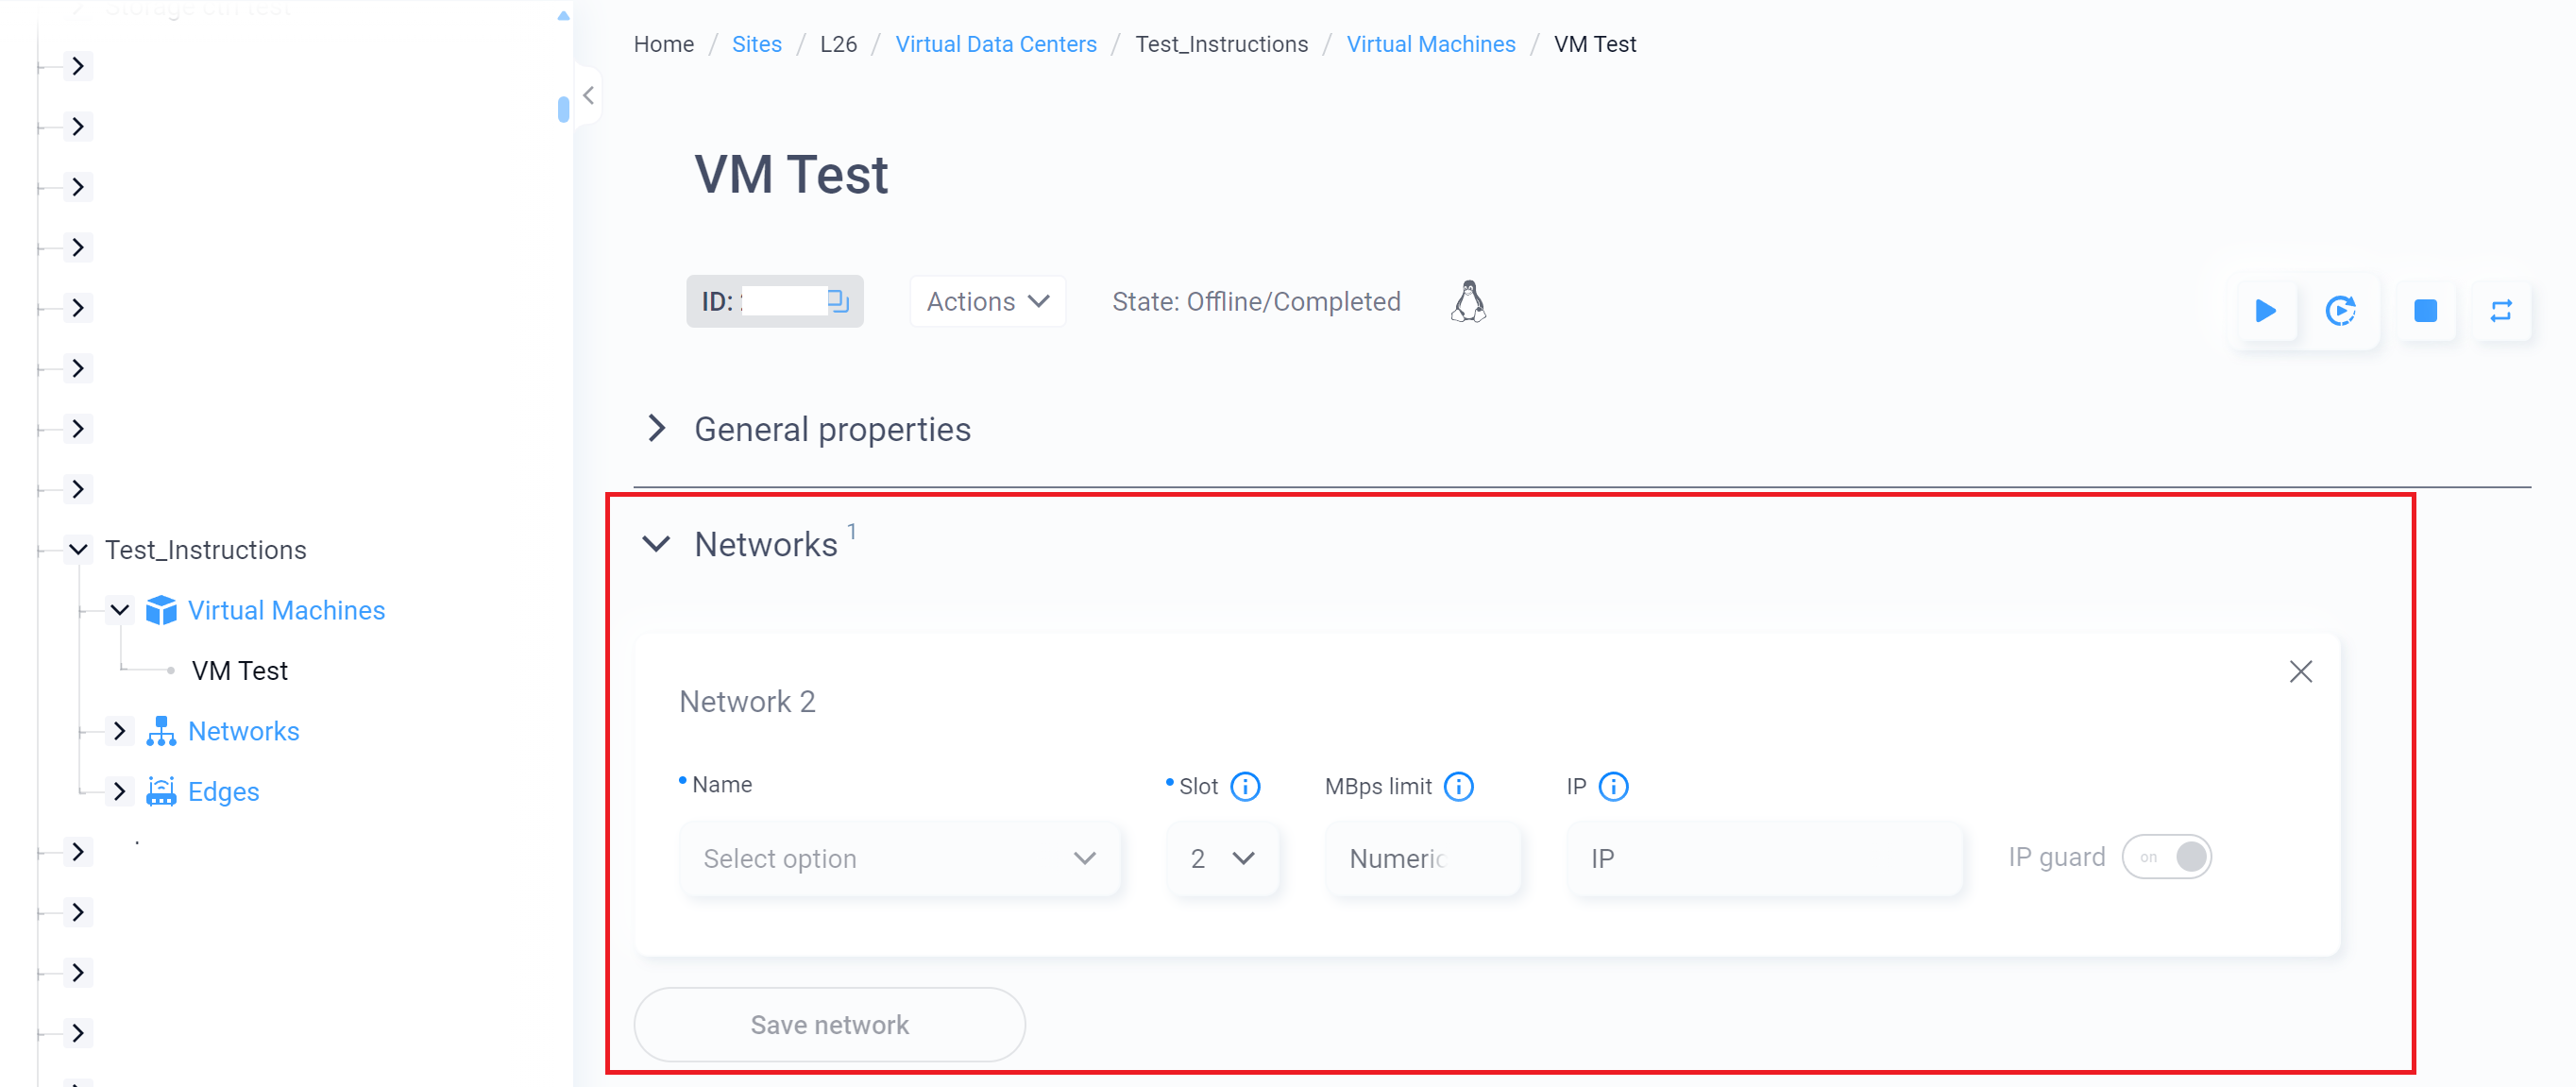
6. Fill in the information about the networks:
- name;
- order;
- bandwidth limitation;
- IP Guard: L3 filtering functionality of this adapter; requires disabling if VM is used as a GW or balancer on an internal (routed) network port; otherwise enabled.
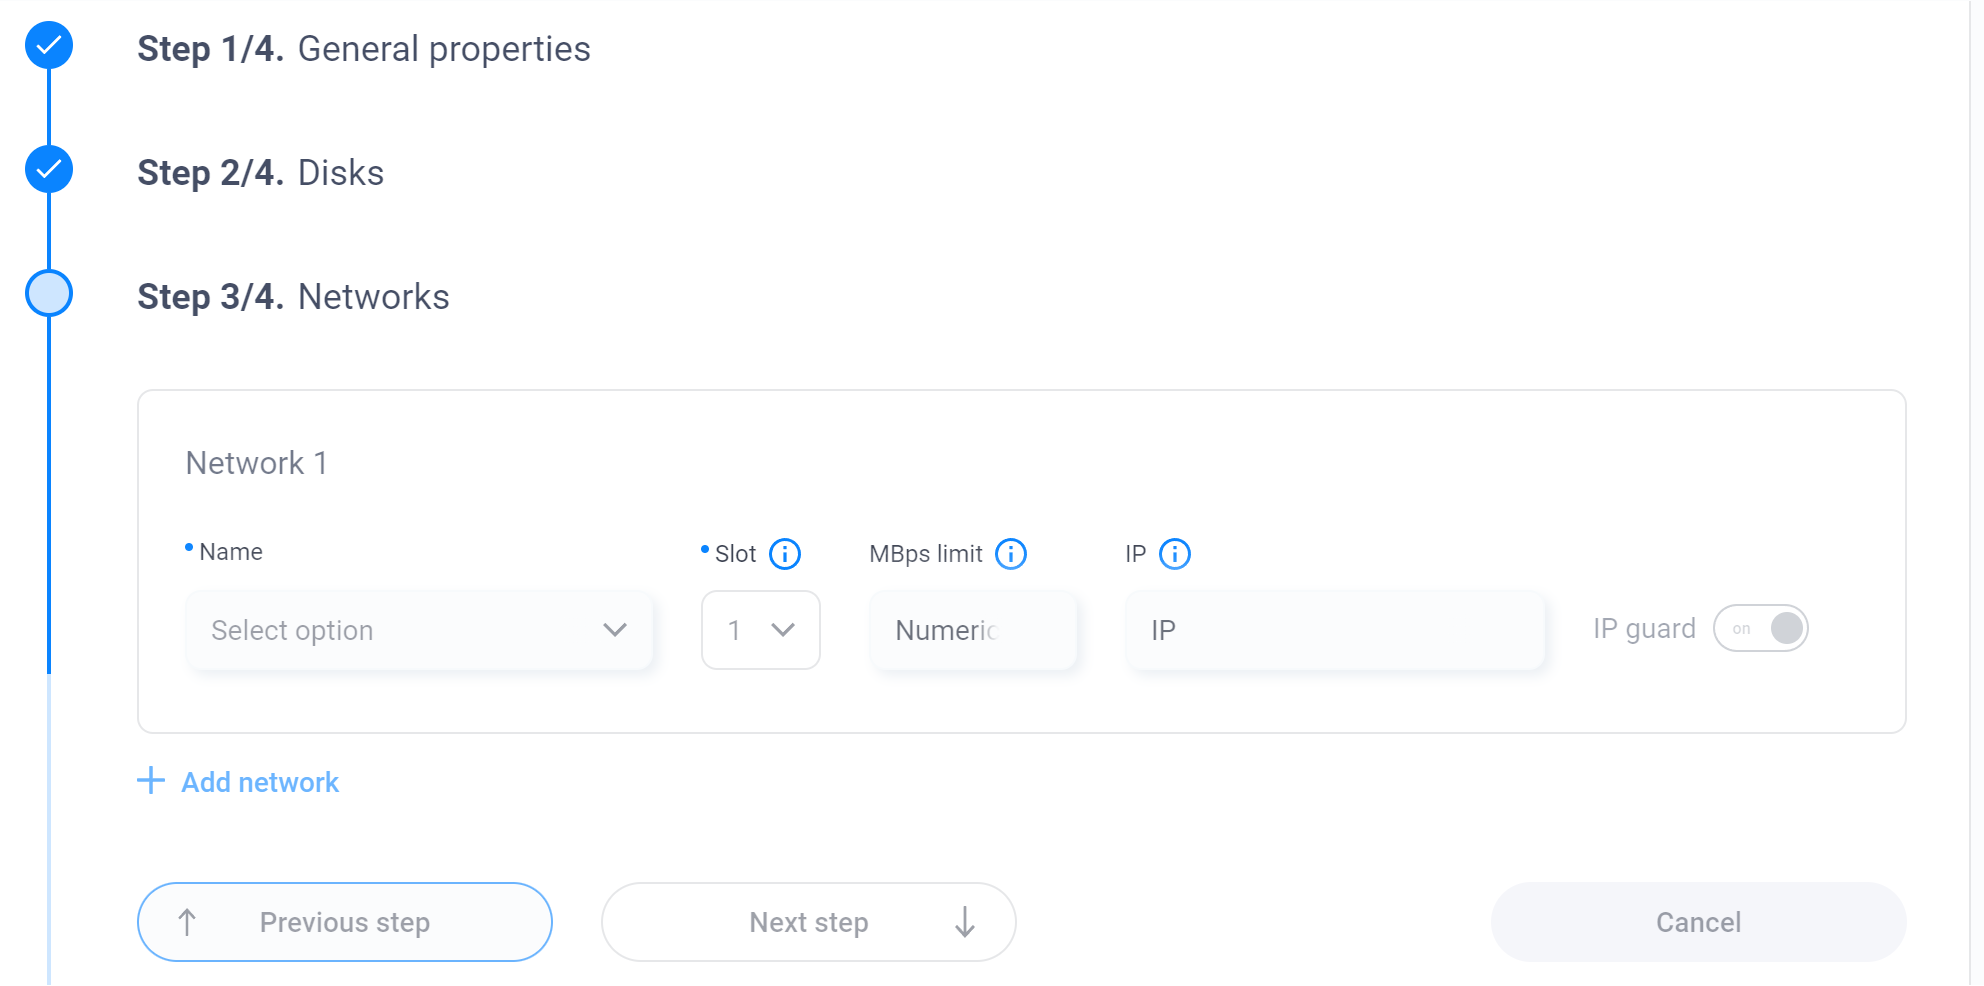
You can also add a new network. There can be no more than 5 networks in total.
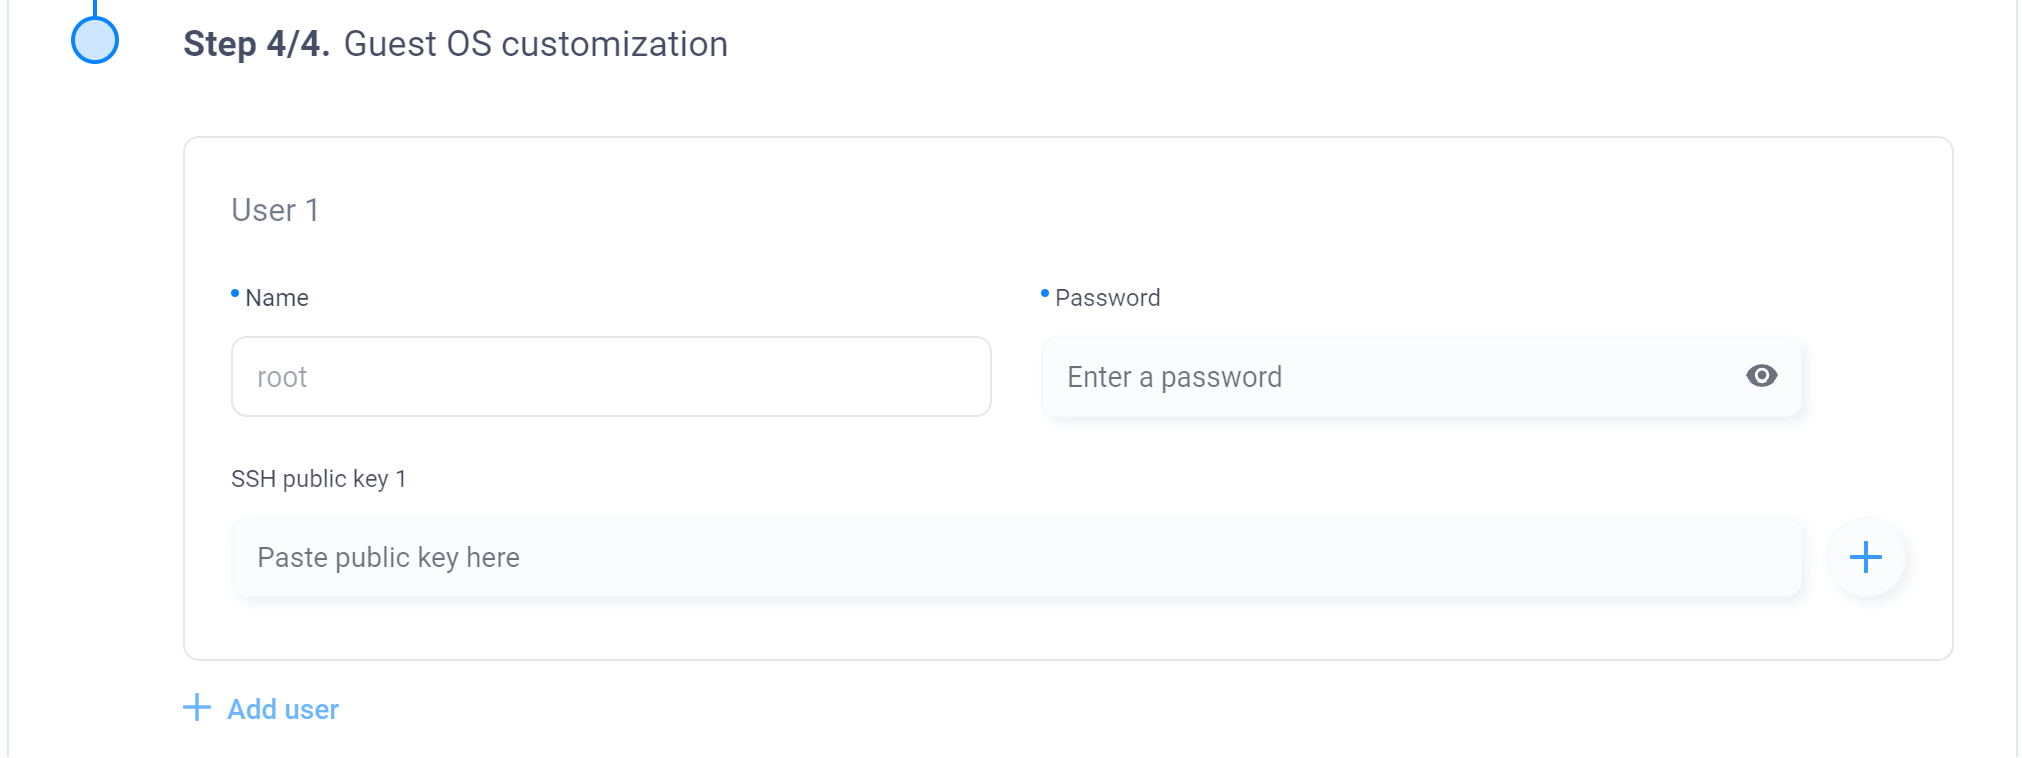
7. Add the login information:
Create new users by filling in the fields:
- username;
- password;
.
You can also add an SSH authorization key.
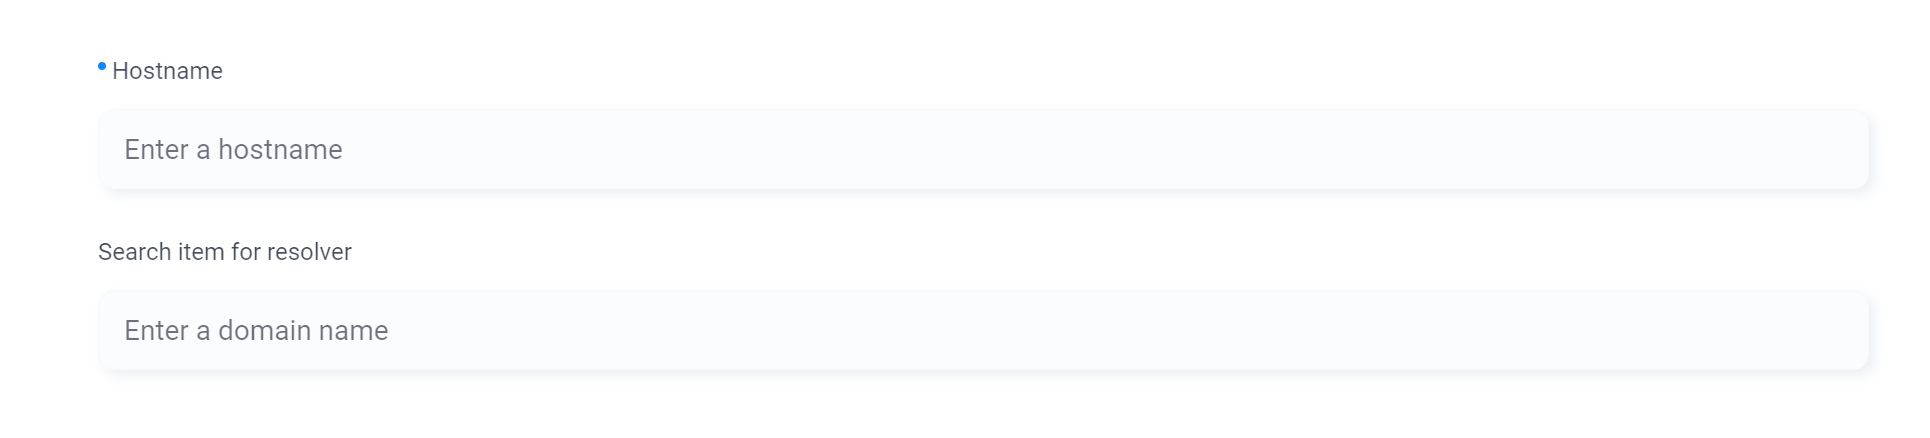
8. Enter the host name and domain name.
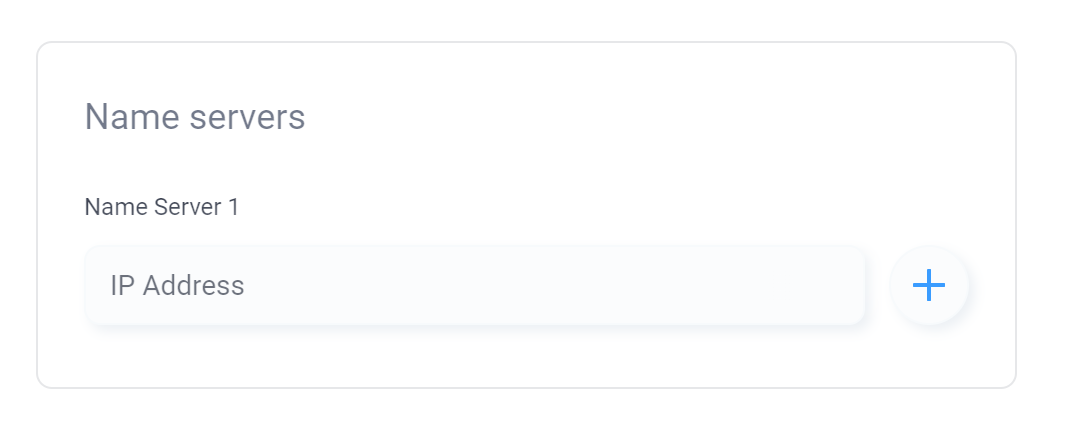
9. Add name resolution servers (optional; public ones will be added automatically if not available).
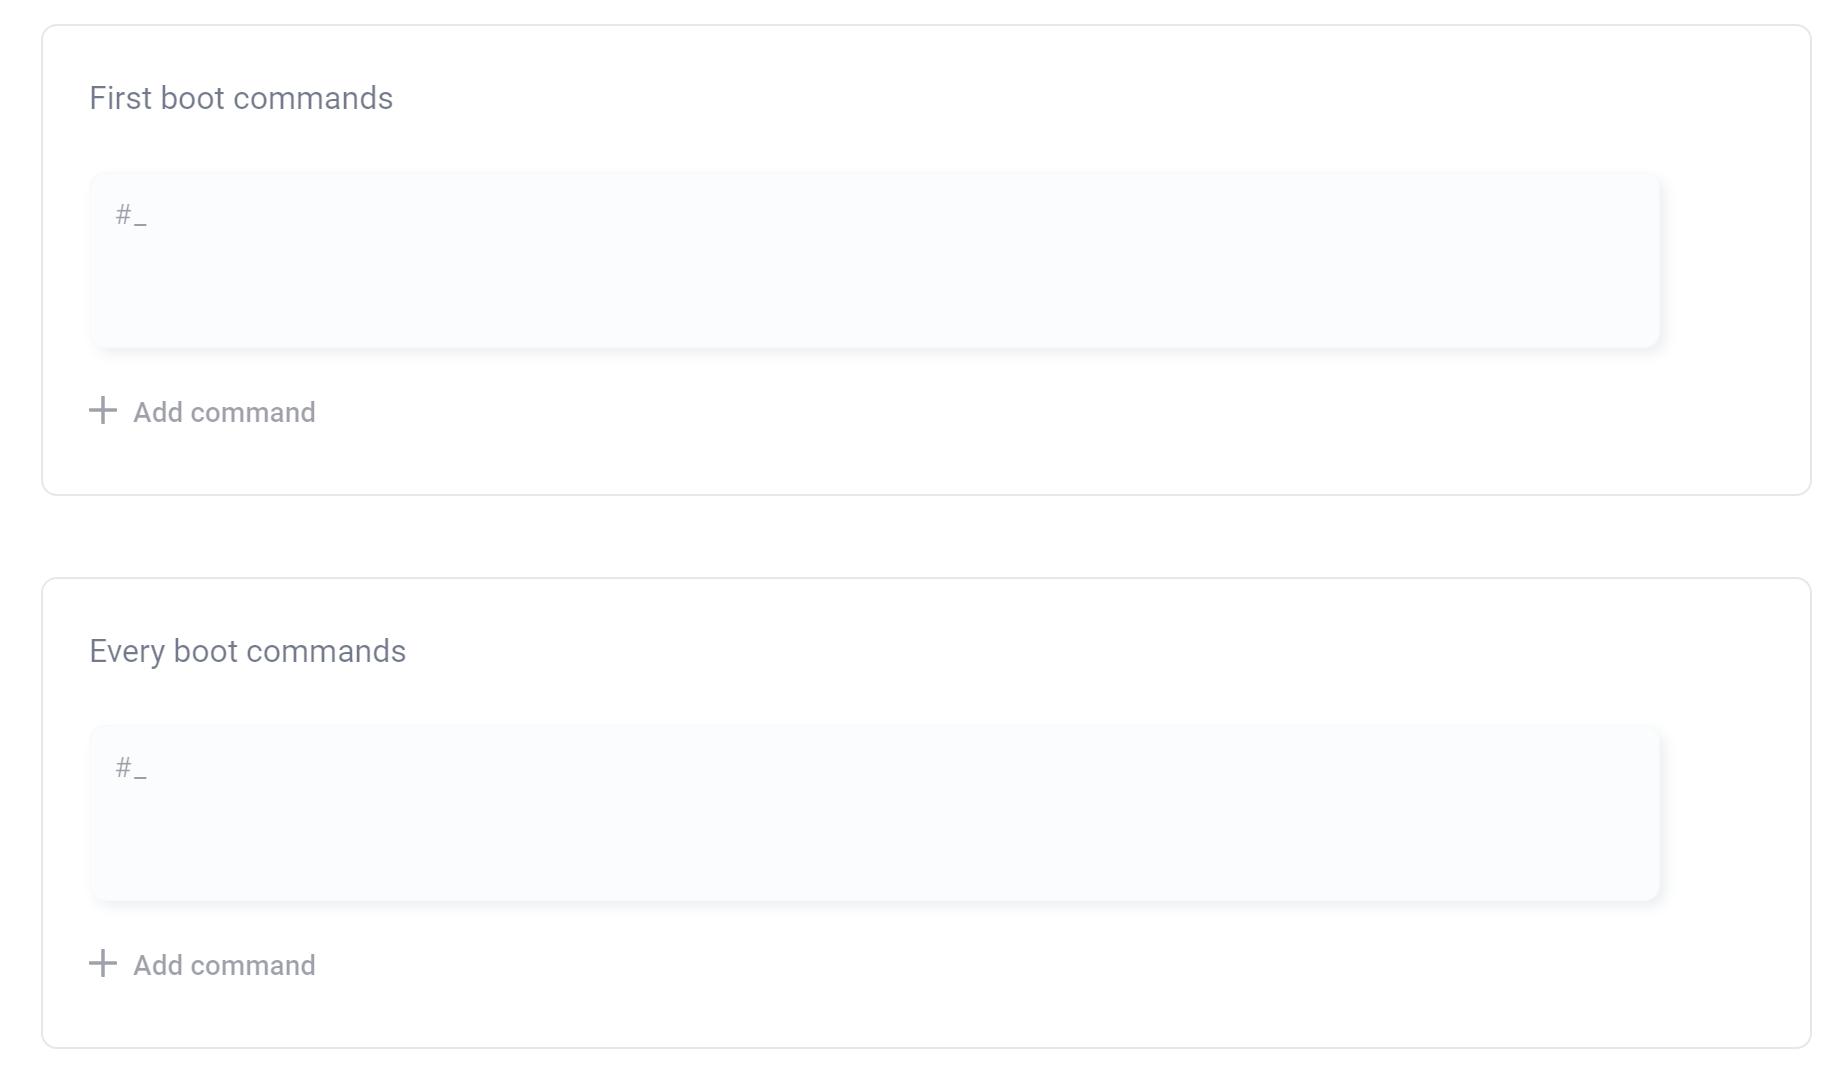
10. Add commands to run on the first or every boot.
11. When all required fields are filled in, click on the Create Virtual Machine button.
After that, the created VM will be displayed in the list of virtual machines of the selected data center and will be available for use.
Start, stop, restart VM
When working with a VM, you may need to start, restart, or stop the VM. To do this, do the following:
- Click the virtual machines tab of the selected data center.
- Click the three dots to the left of the desired VM name.
- In the list that opens, select the desired action: Start to start, Stop to stop or Restart to restart.
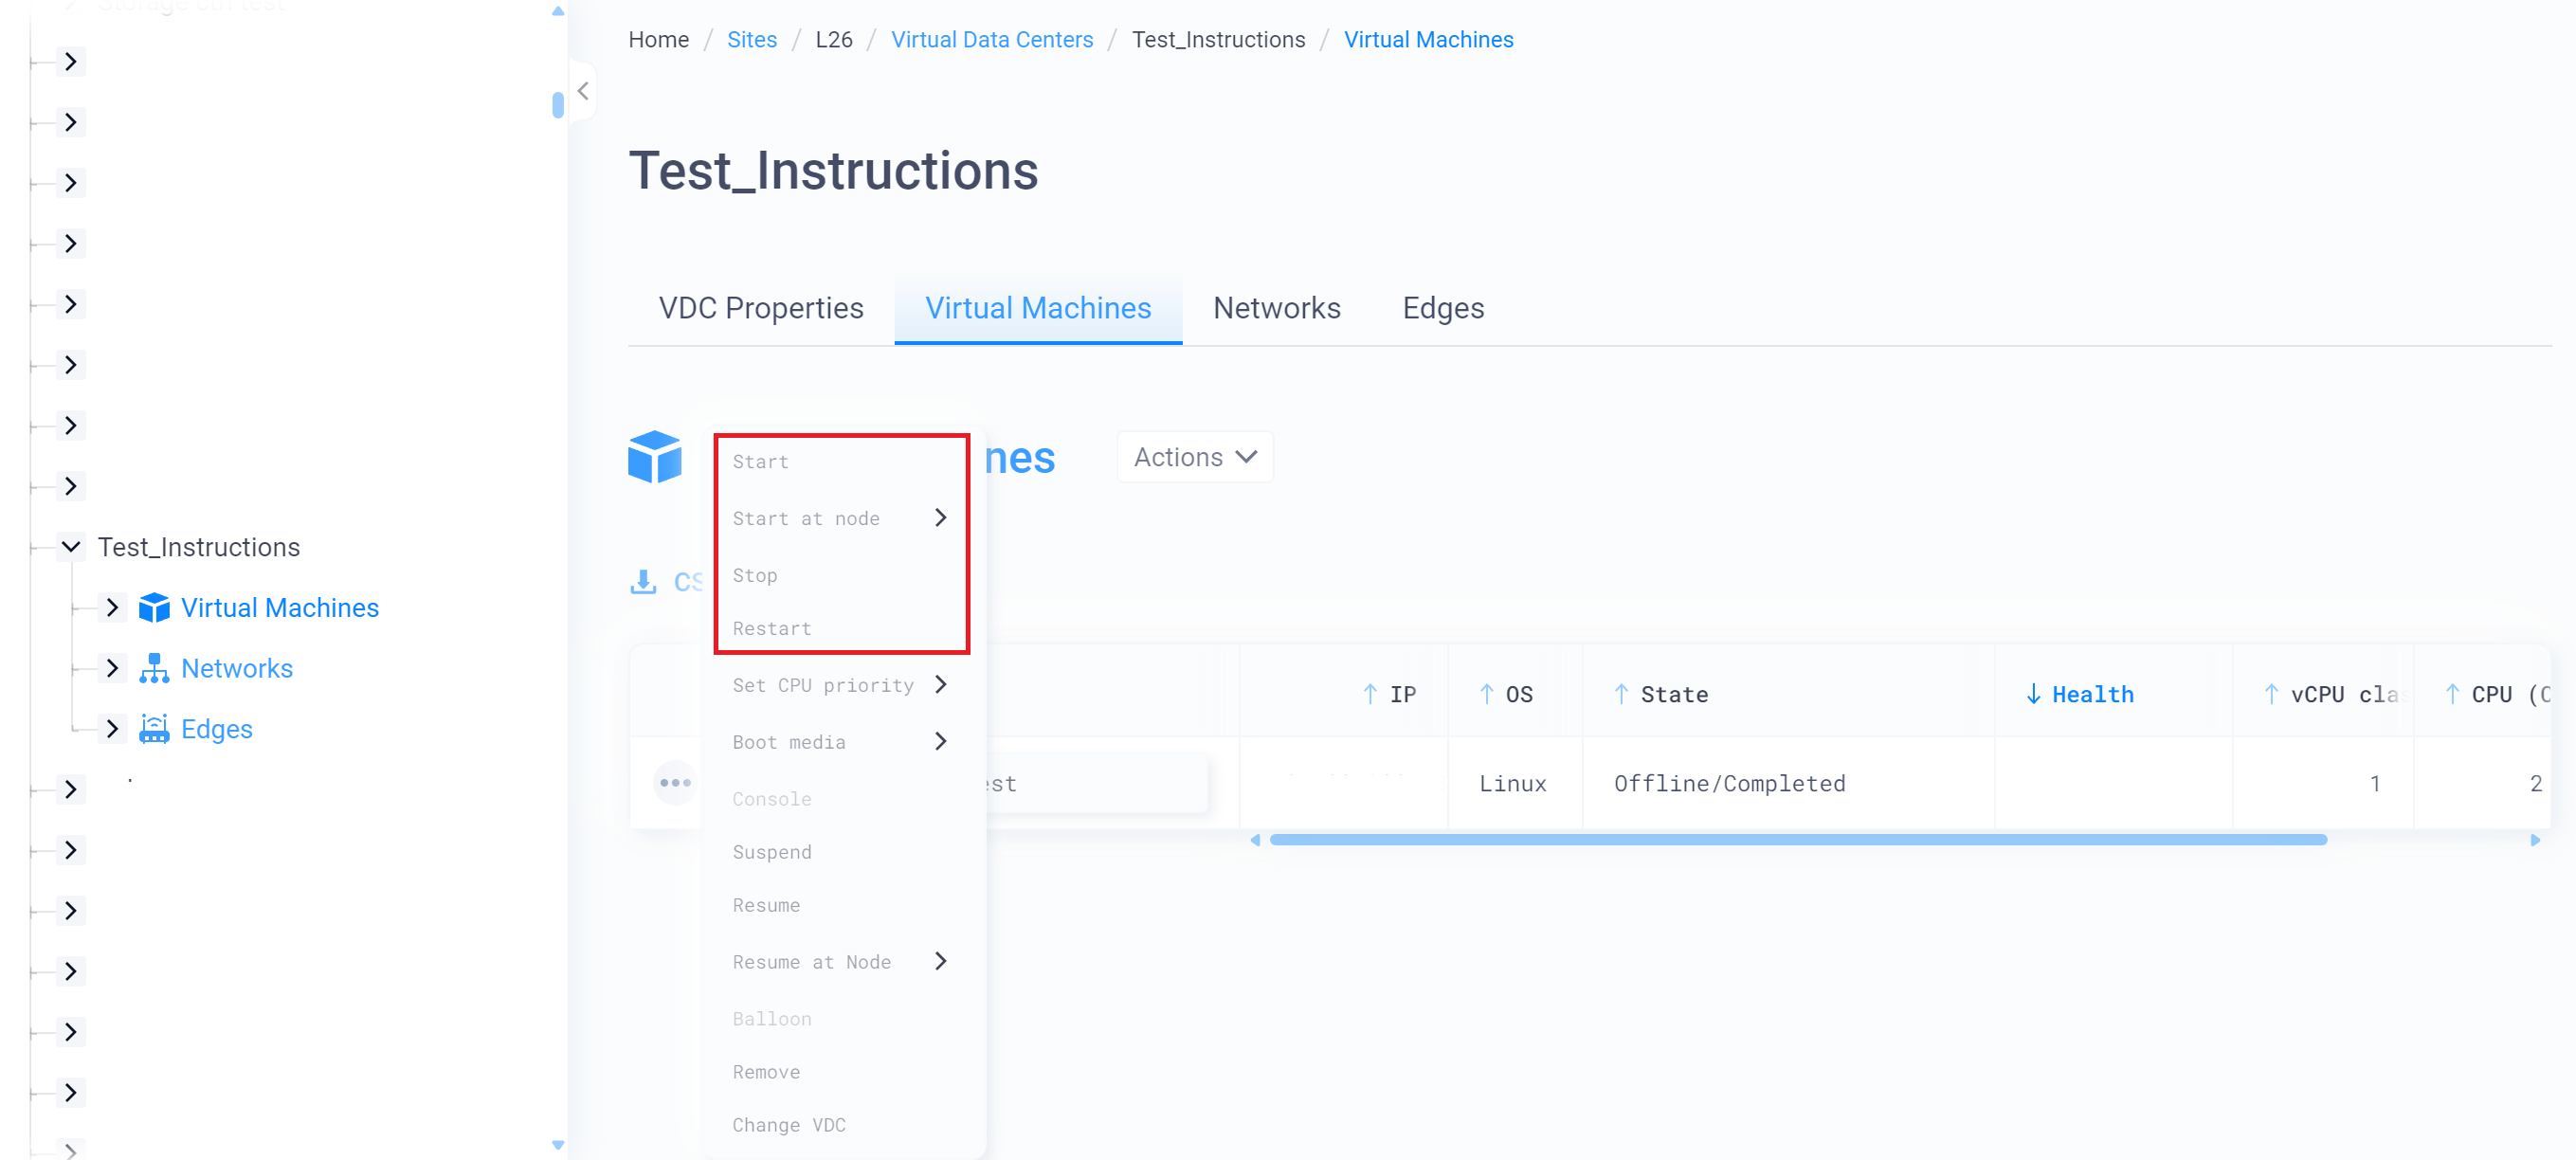
Depending on the selected action, the VM will start, restart, or stop.
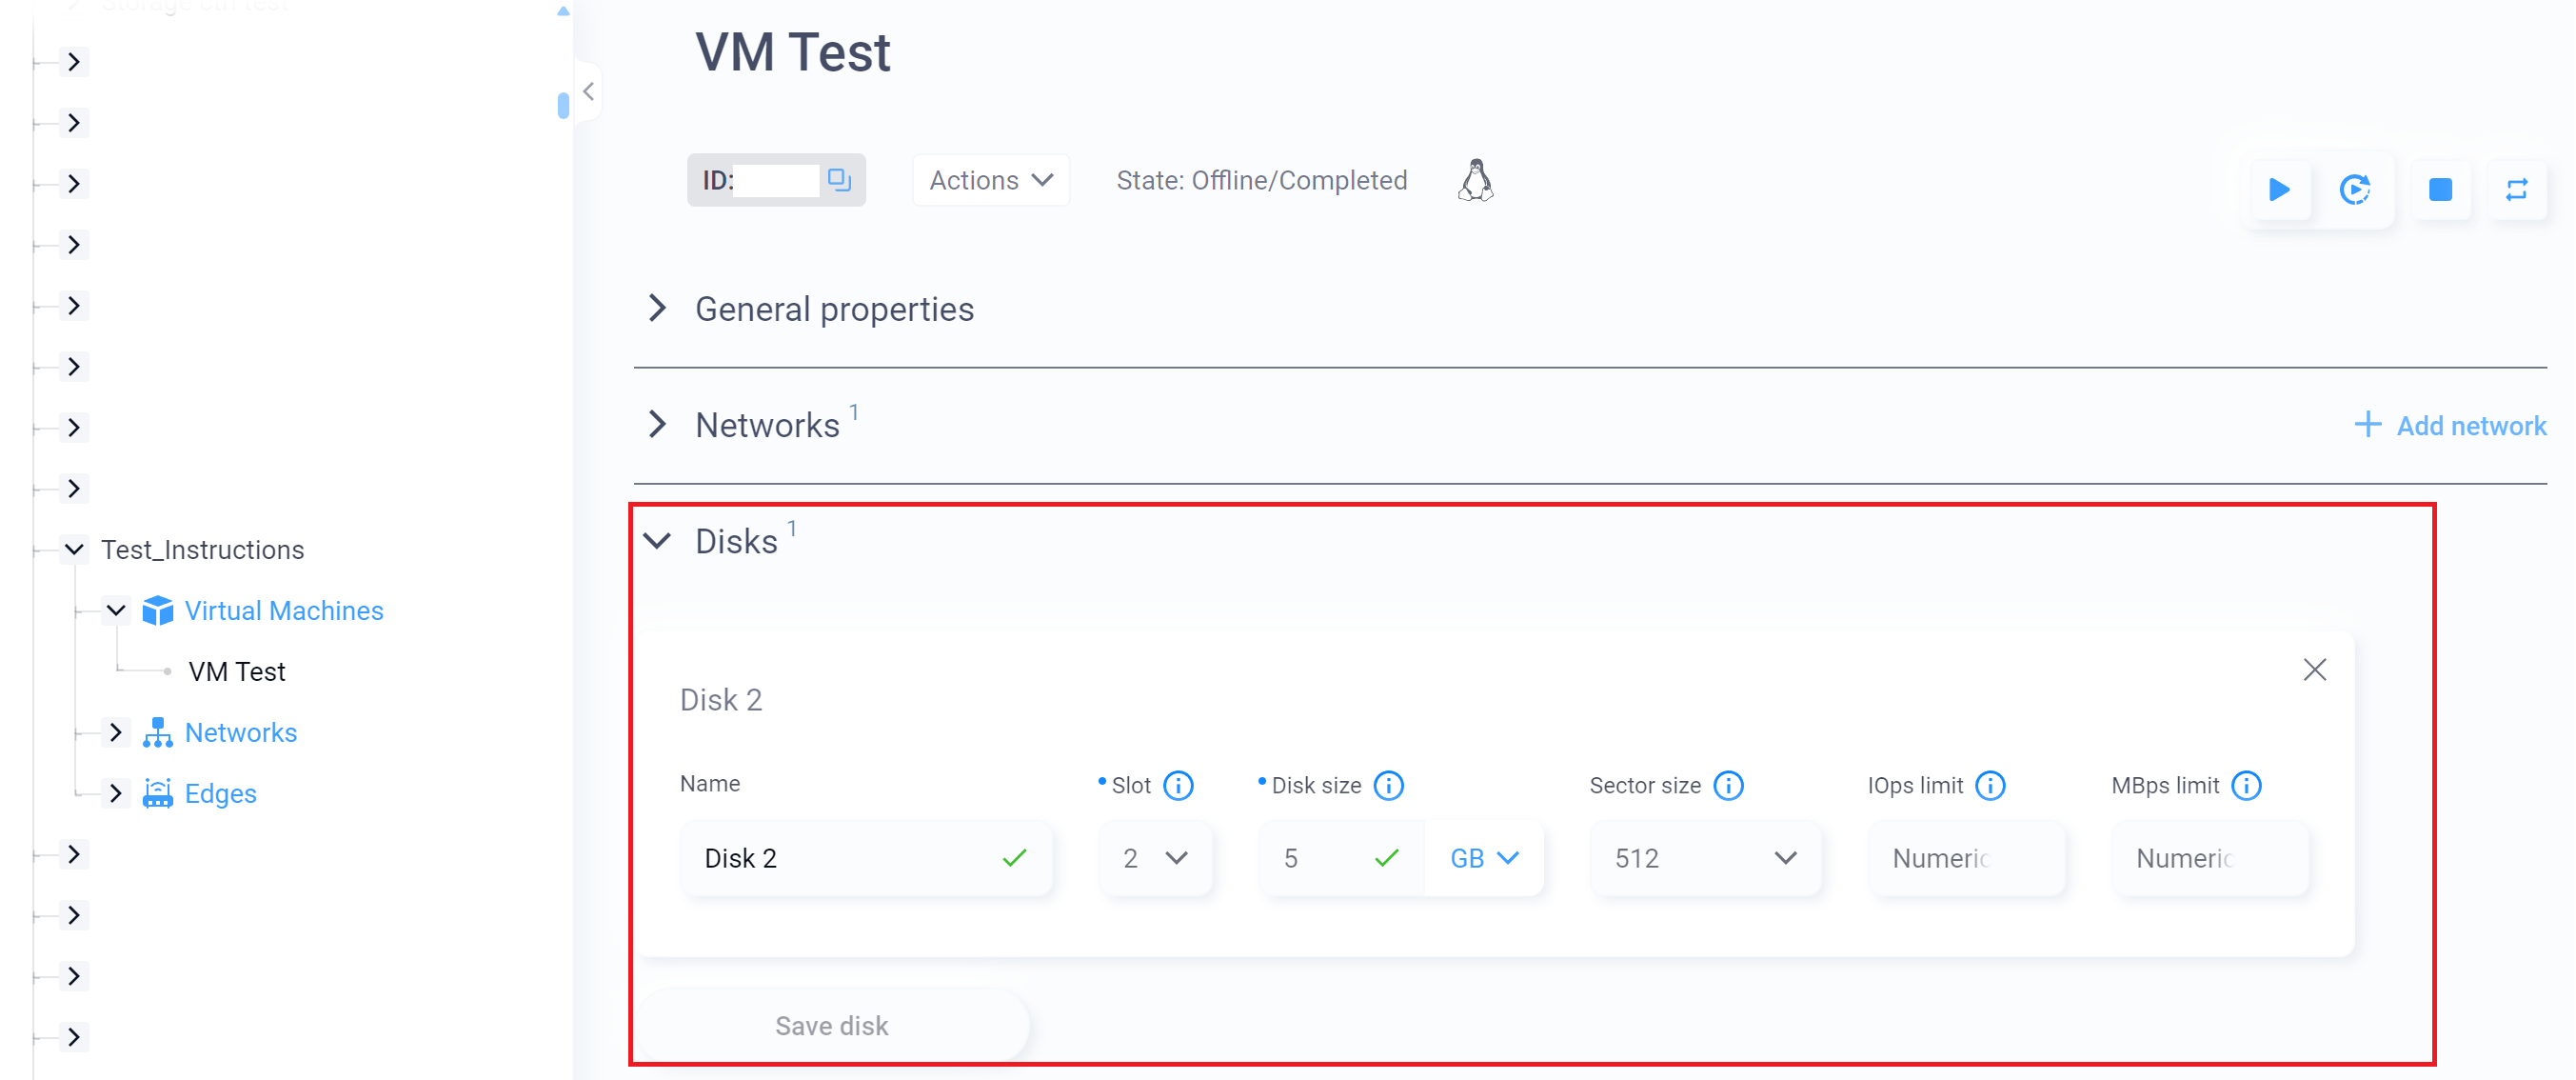
Modification of VM
Once a VM is created, it can be modified by adding additional disks or virtual networks.
To add a new disk, follow these steps:
1. Expand the Disks list and click Add Disk.
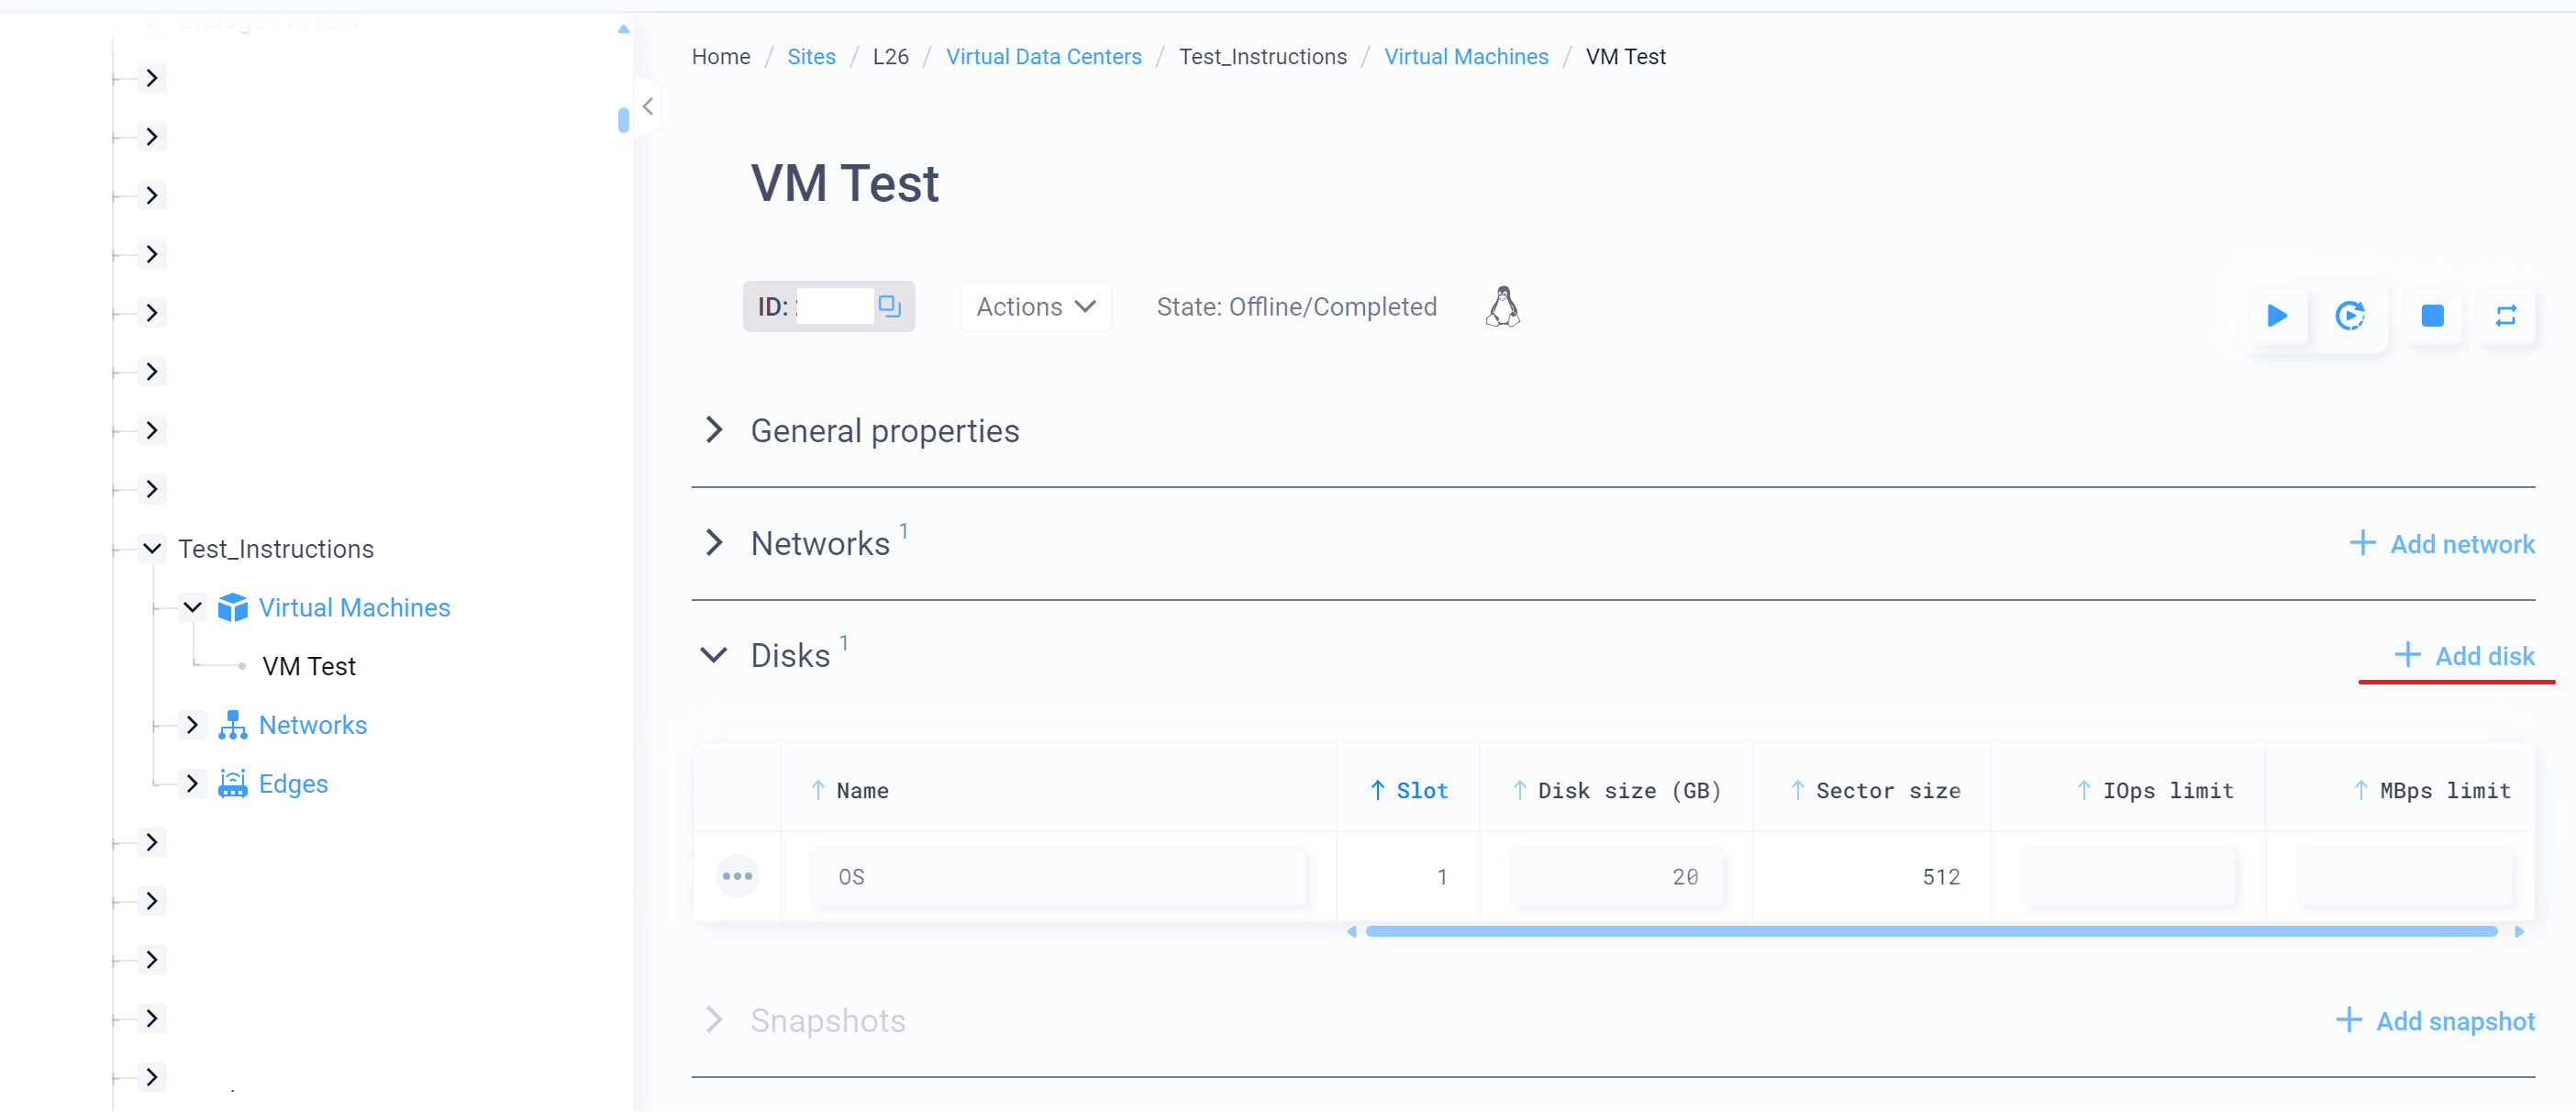
2. Fill in the fields:
- disk name;
- slot;
- disk size (GB);
- disk physical sector size (512 by default);
- performance limitation in IOPS;
- limit bandwidth in MB;
Follow the steps below to add a new network:
1. Expand the Networks list and click the Add Network button.
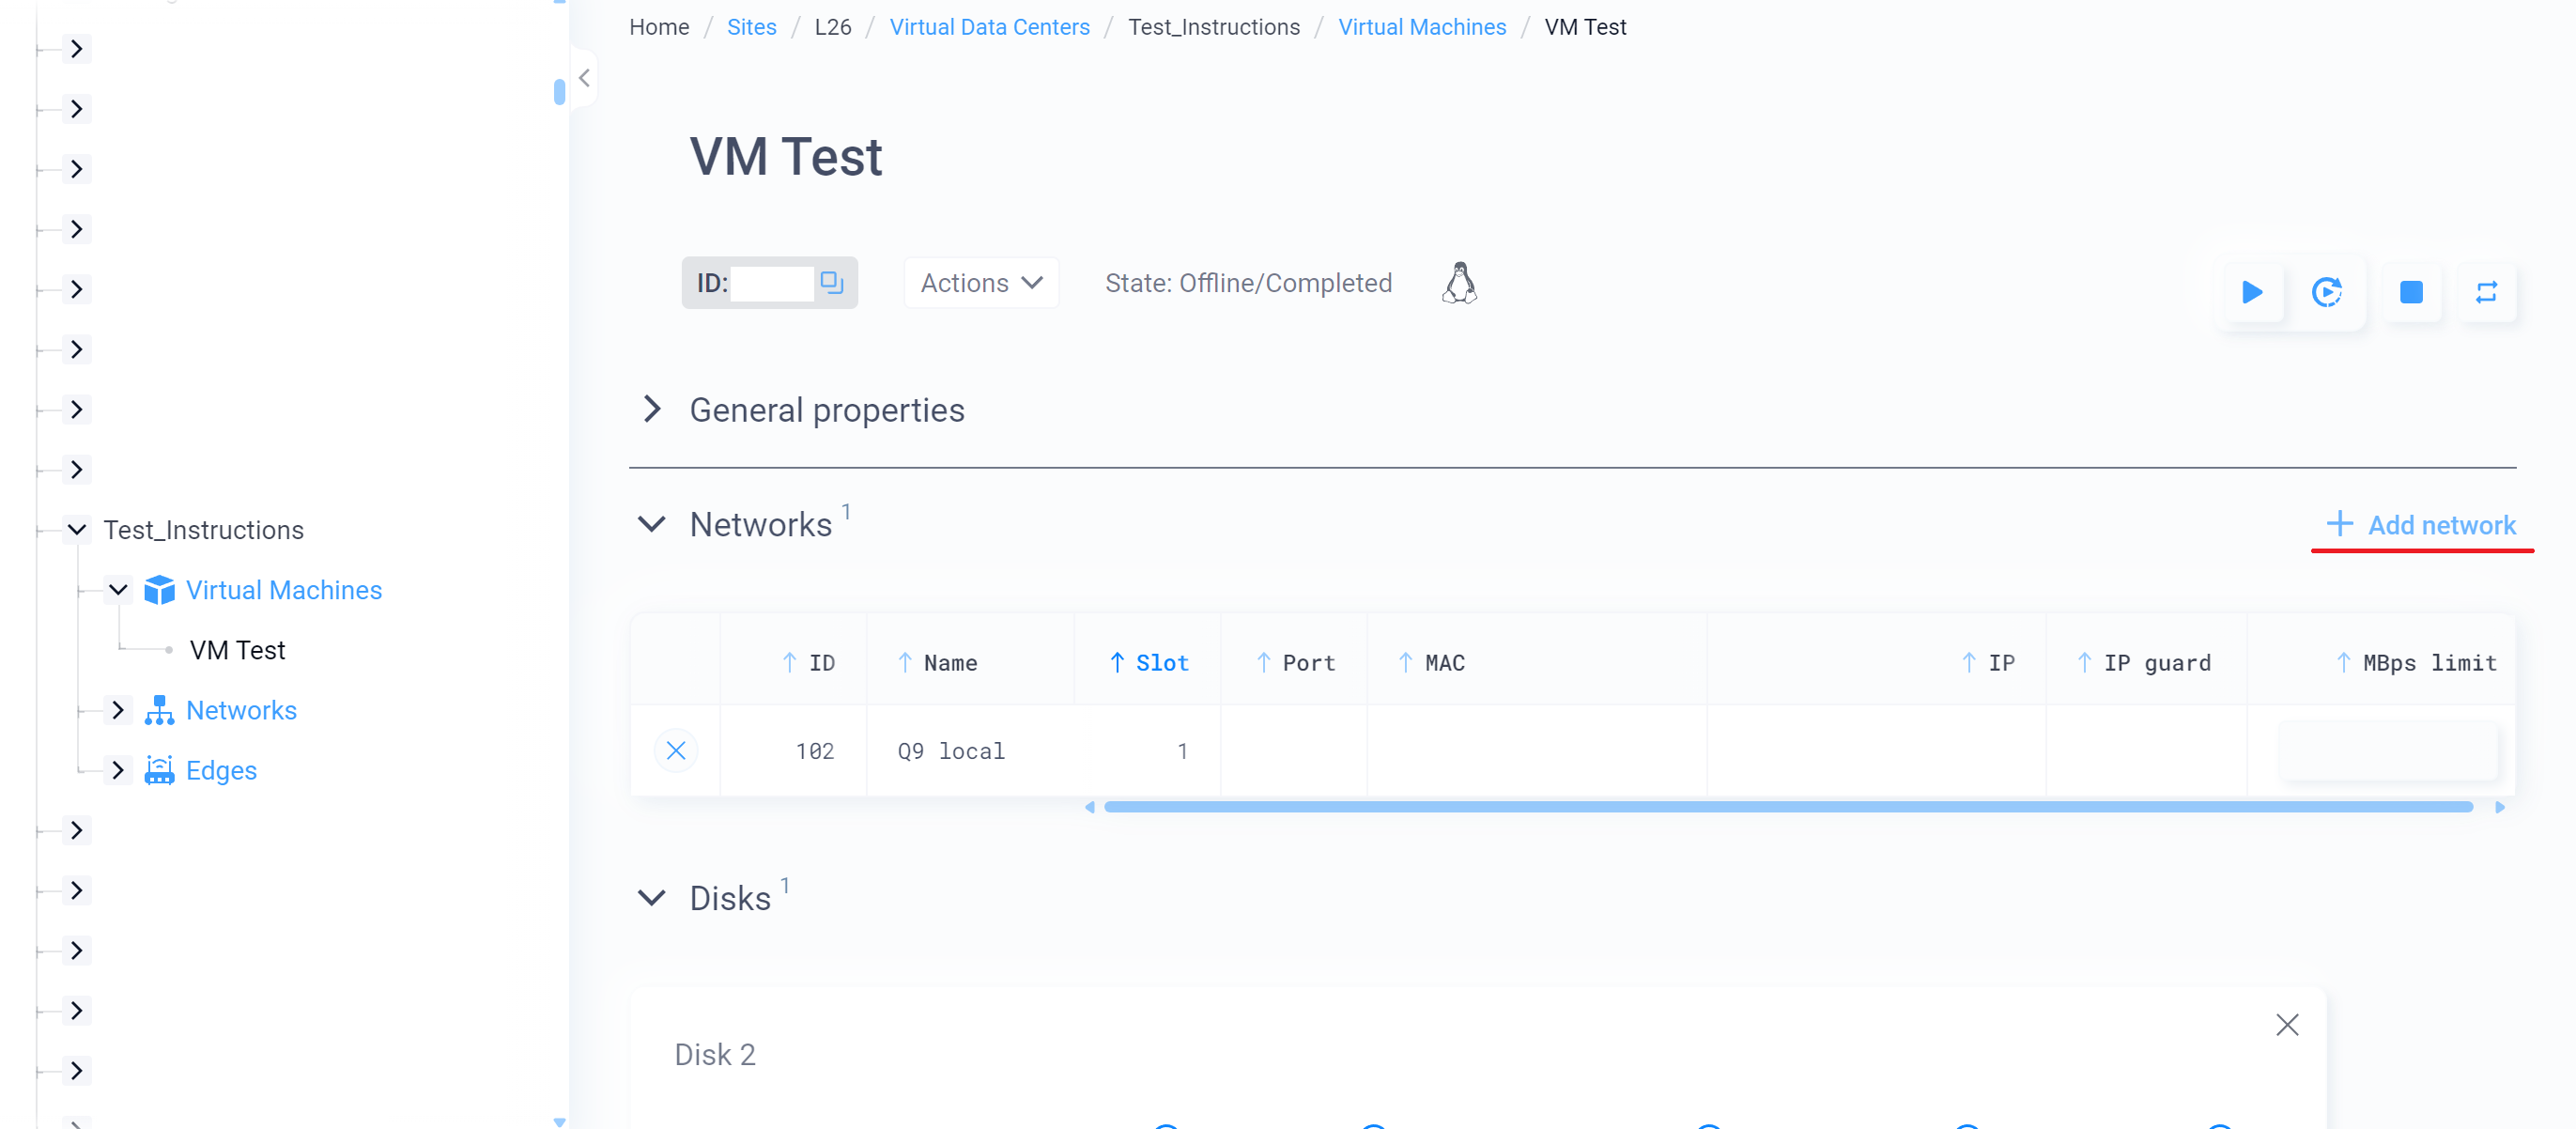
2. Fill in the fields:
- name;
- slot;
- bandwidth limit;
- IP;
- IP control.
Creating a VM snapshot and rolling back the VM to the snapshot
If you want to create a VM snapshot, follow these steps:
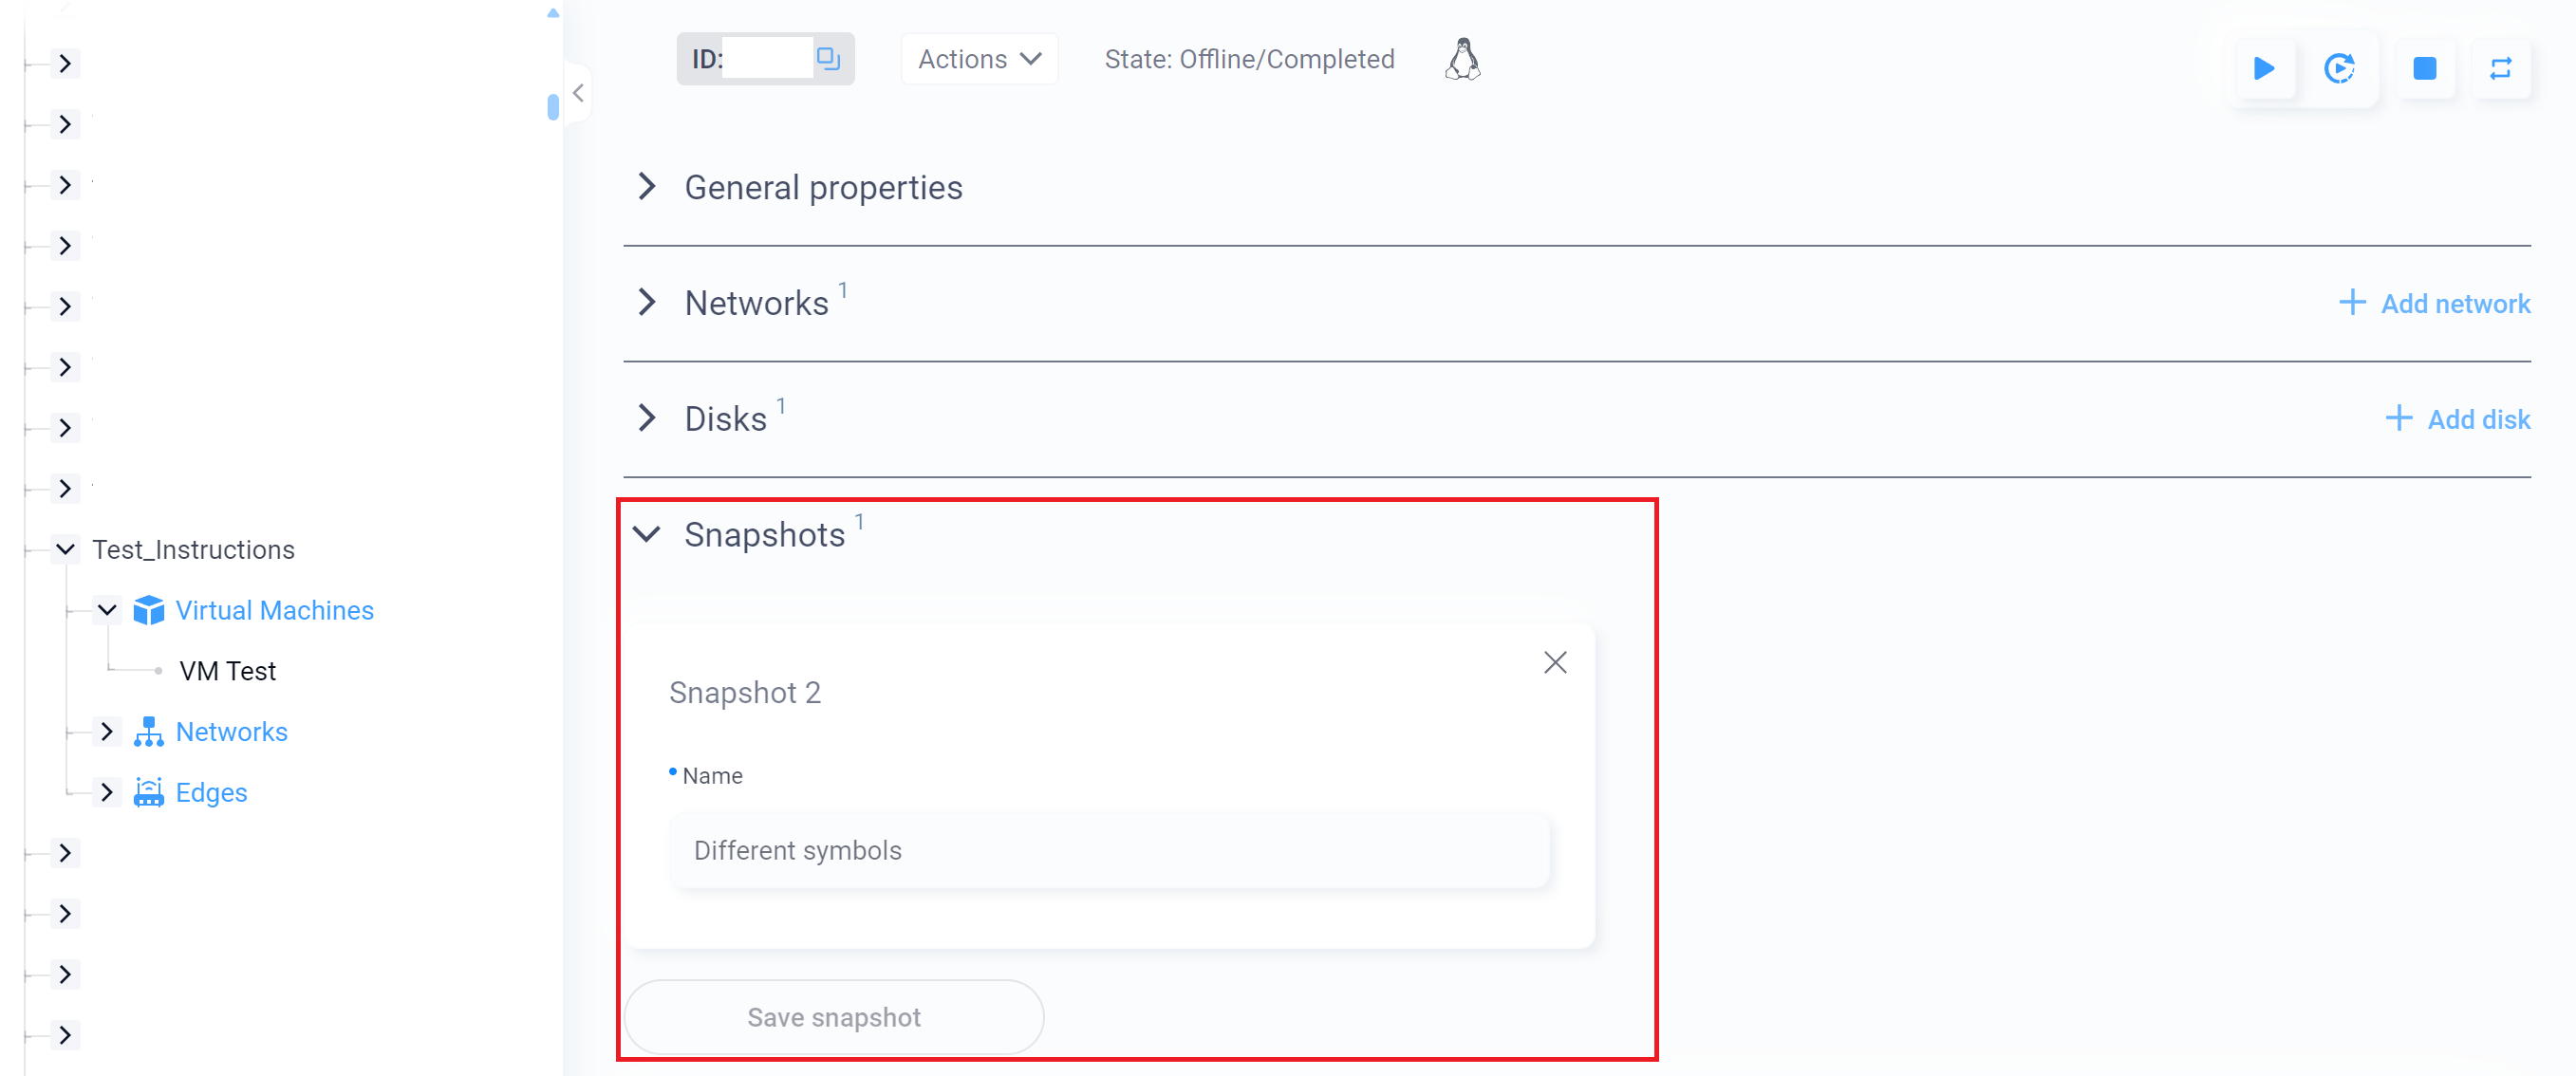
1. Expand the Snapshots list and click the Add Snapshot button.
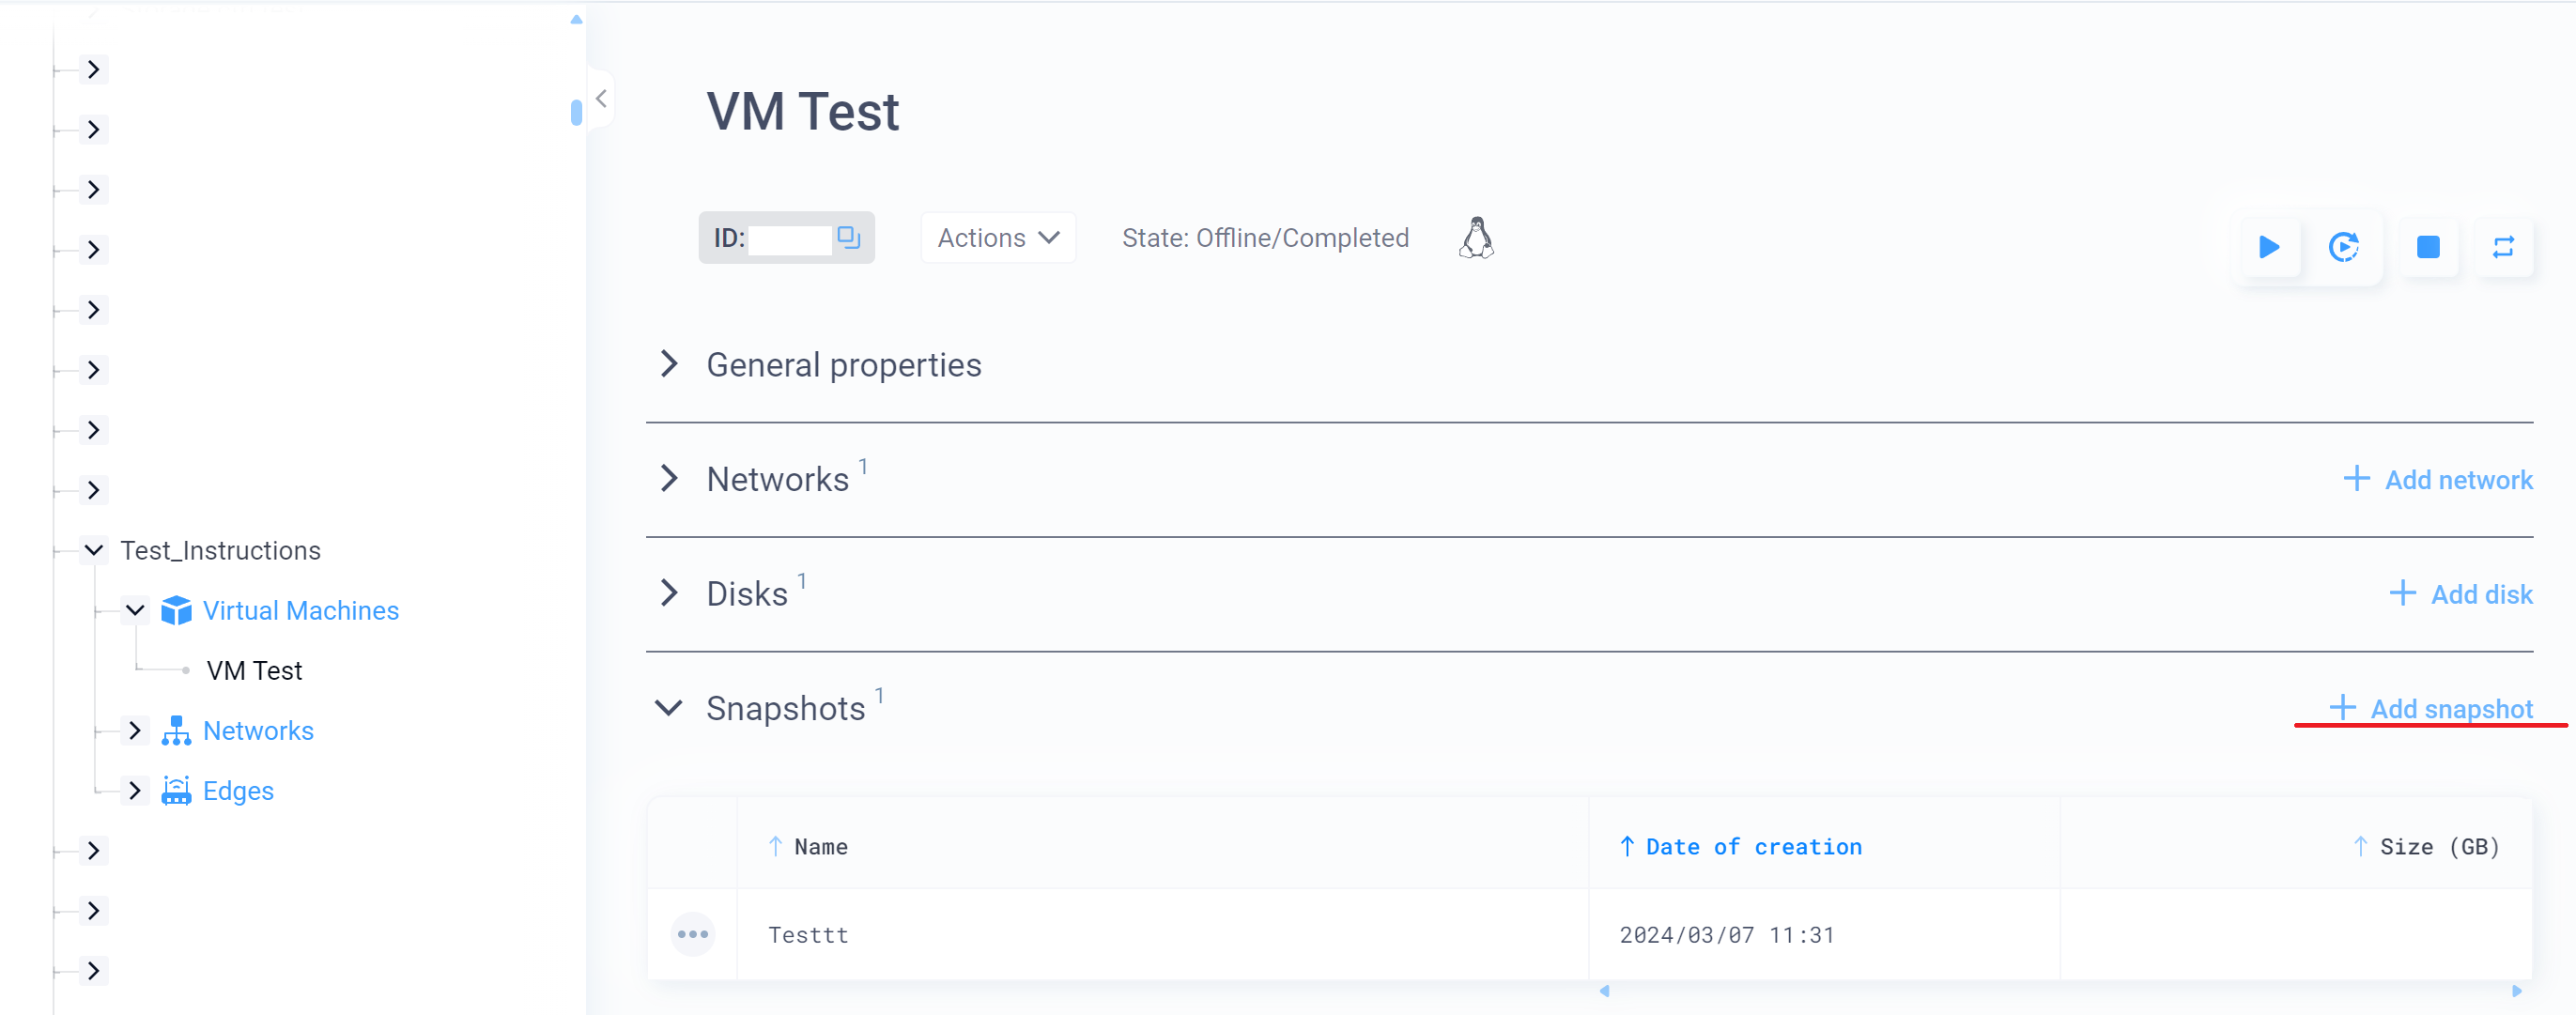
2. Enter a title and save the snapshot.
If you need to roll back the VM to a snapshot or delete it, then:
- Click the three dots to the left of the snapshot name.
- Select the desired action.
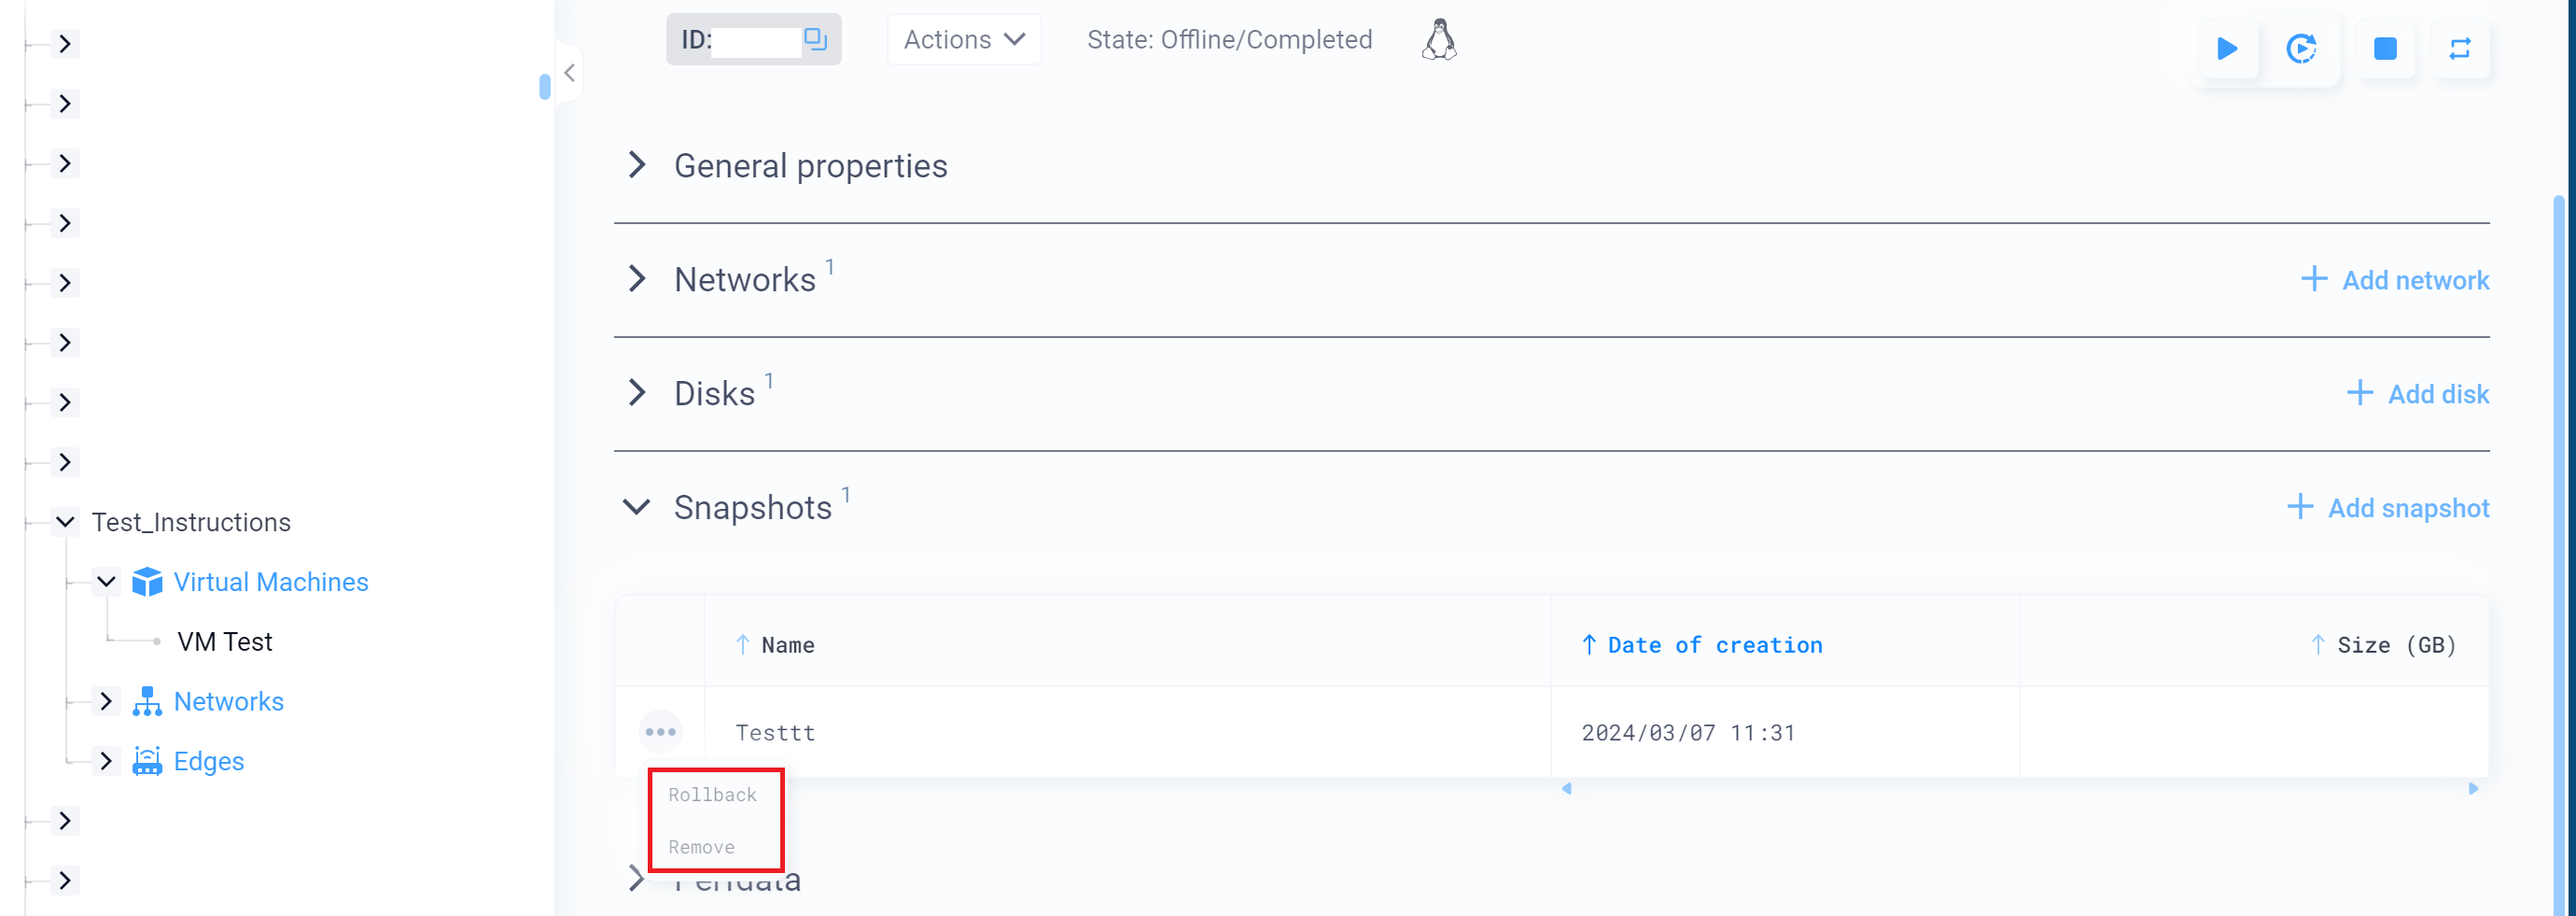
When a VM rolls back to a snapshot, all subsequent snapshots are automatically and irrevocably deleted. The actual snapshot to which the rollback is made remains.
Accessing the VM Console
To access the VM console:
1. Click the VM tab.
2. Click Actions and select Consoles from the drop-down list.
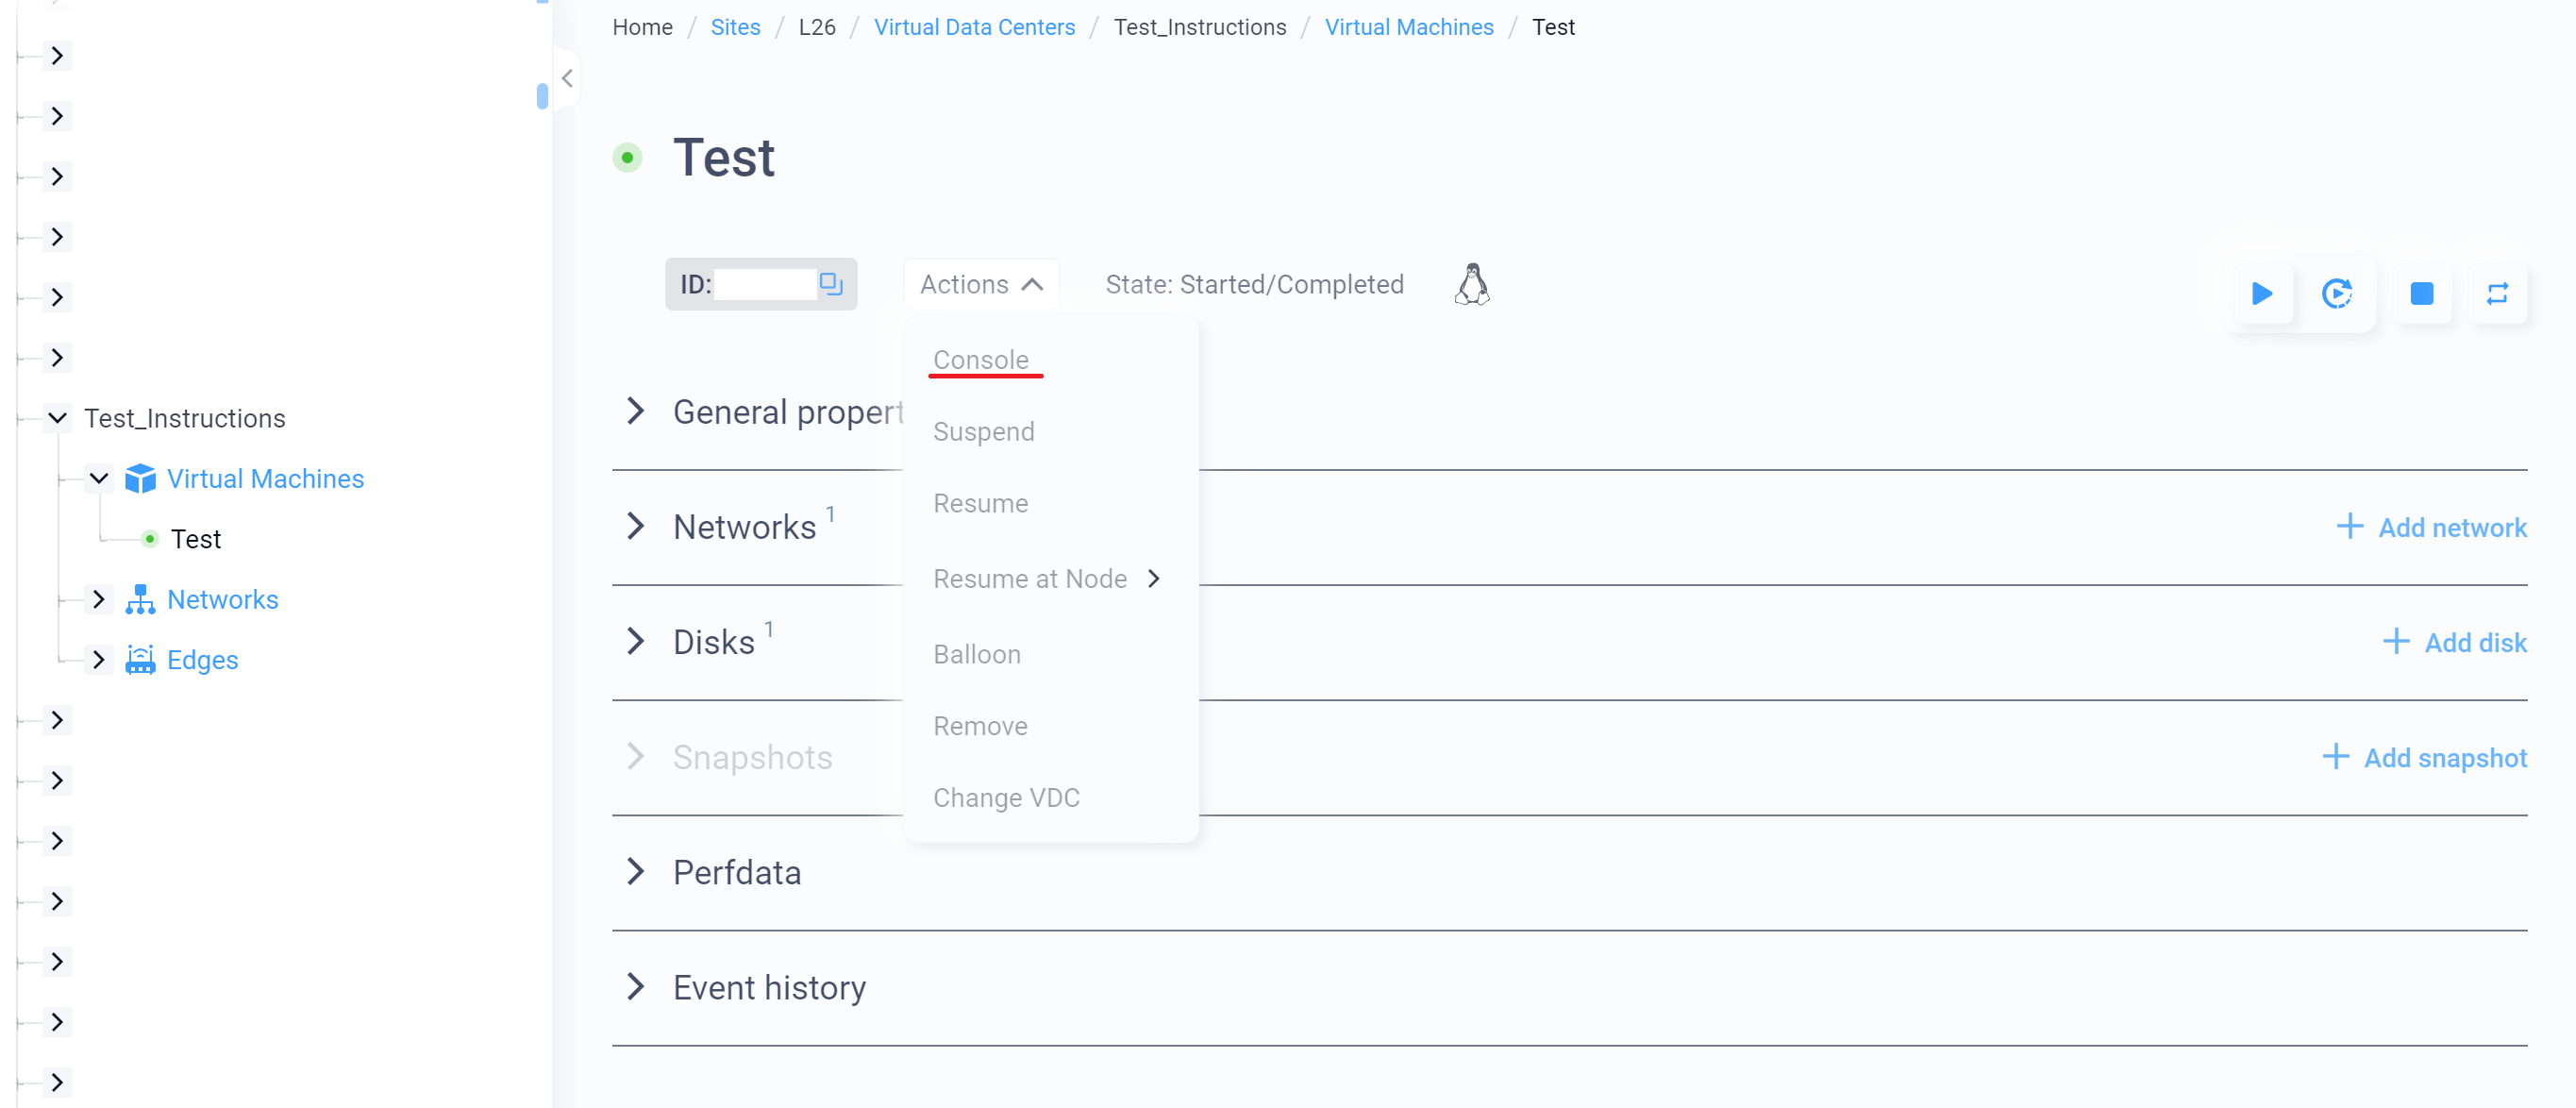
3. The console will open in a new window.
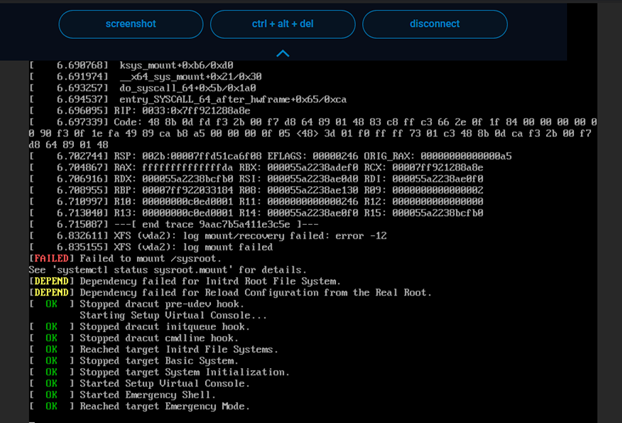
4. When you click on the arrow at the top of the screen, additional actions will appear: screenshot to take a screenshot of the console (the screenshot will be saved to the clipboard), ctrl + alt + del to send the keyboard shortcut to the VM, disconnect to disconnect.
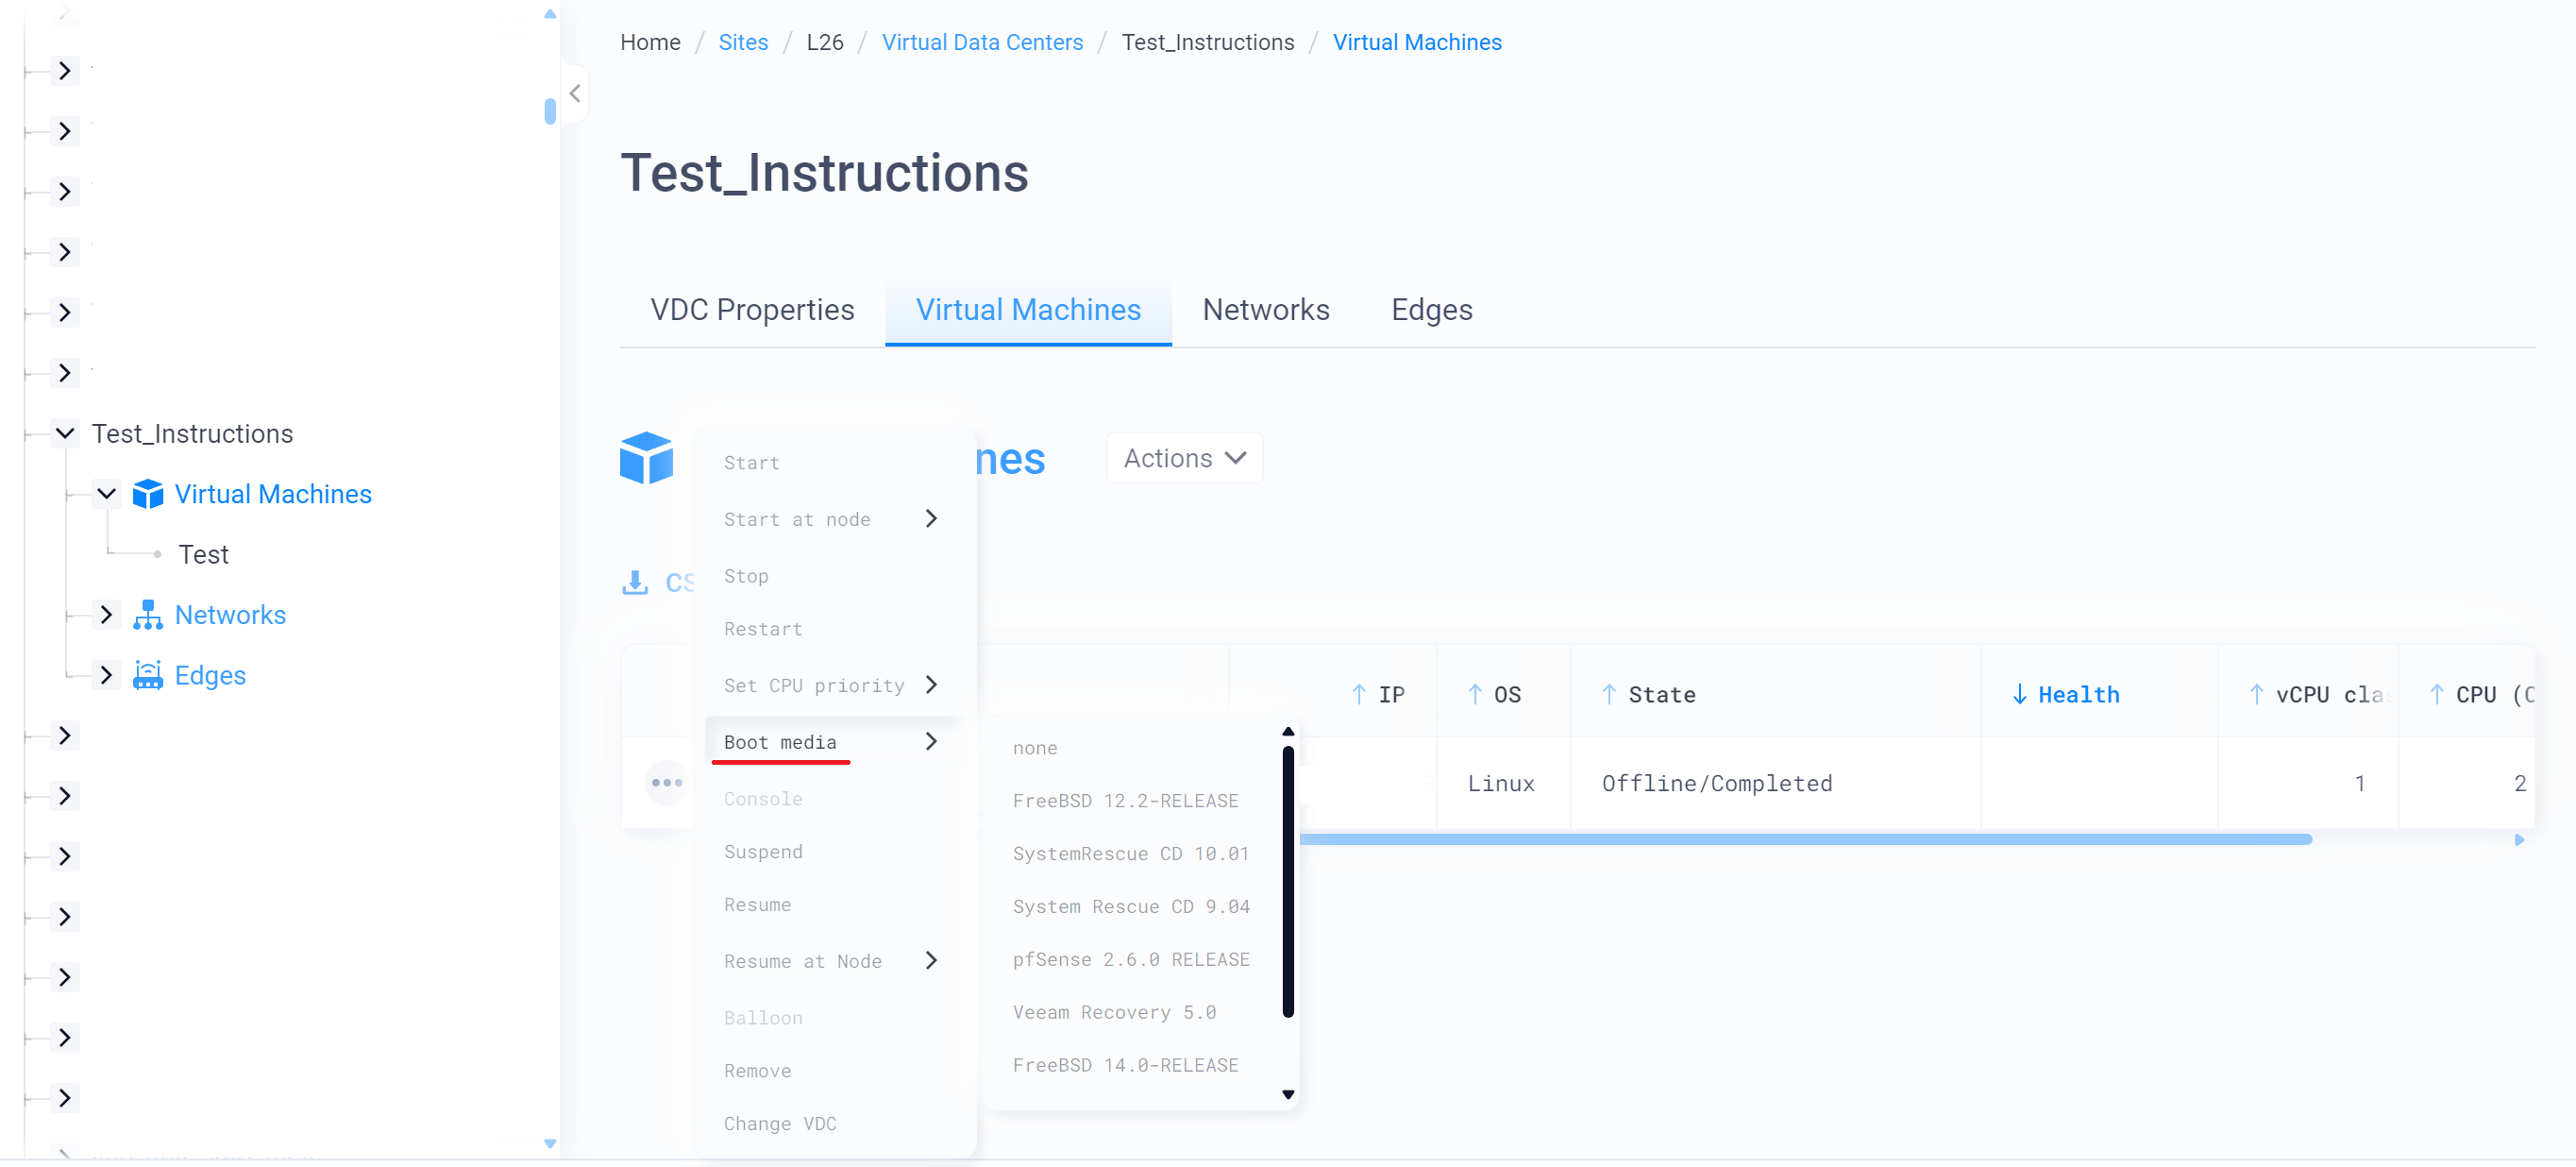
Use recovery media
Recovery media allows you to boot the VM from external media in order to restore VM operation, fix OS errors, and so on. To use this functionality, follow these steps:
- Click on the virtual machines tab of the selected data center.
- Click on the three dots to the left of the VM name.
- In the drop-down list that opens, hover over Recovery Media and select the desired media.
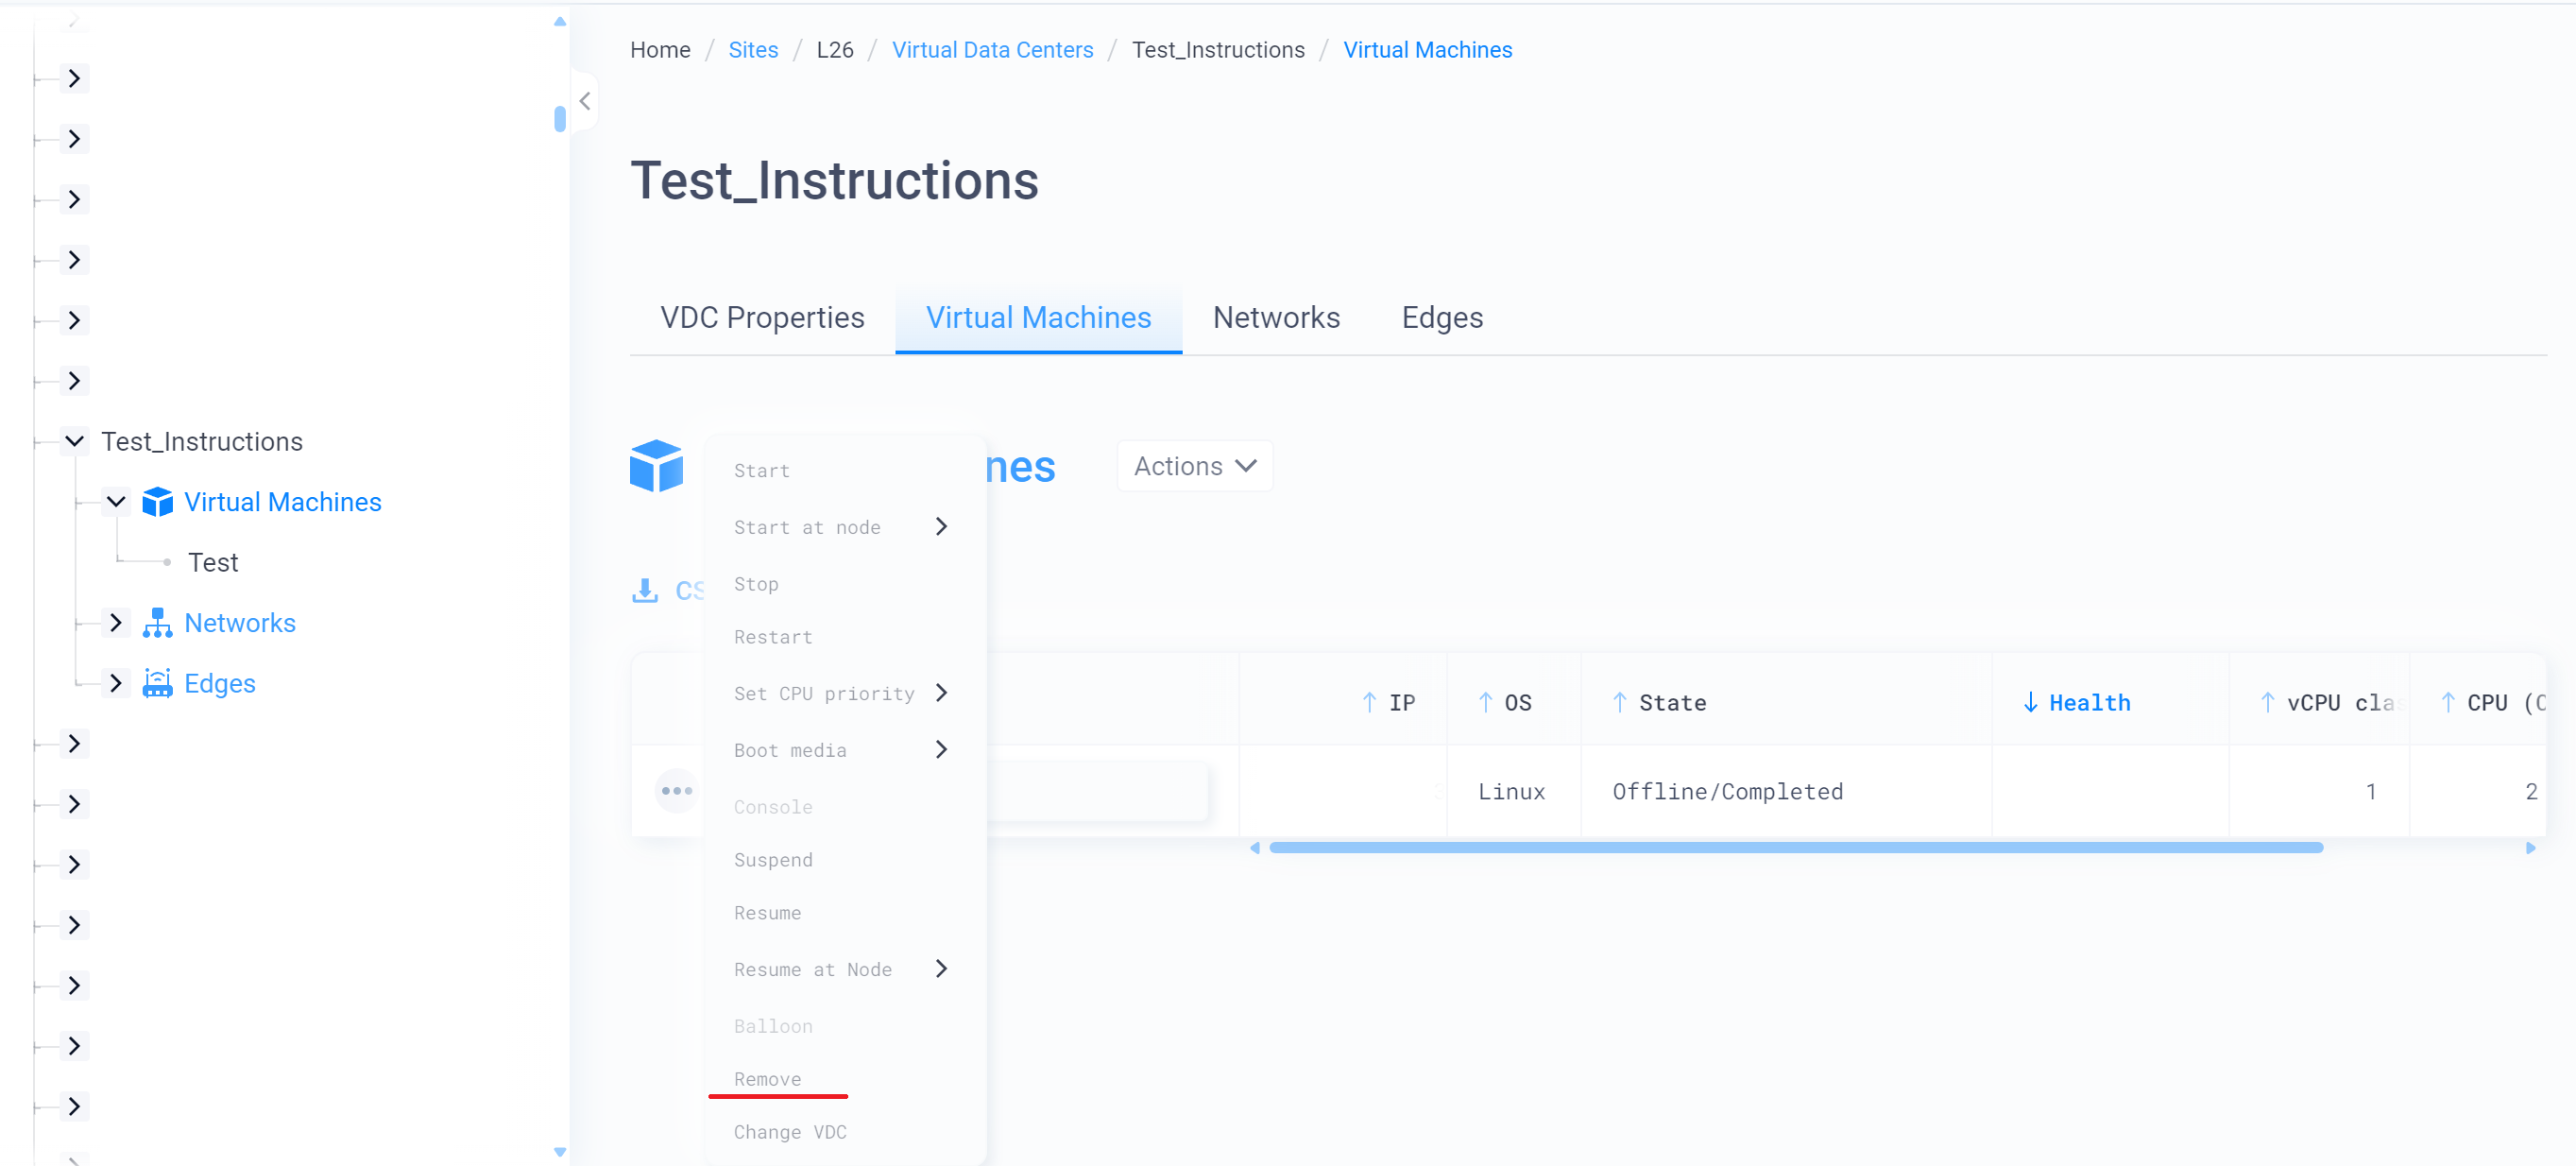
Removing a VM
You may also need to delete an existing VM. To do so, perform the following steps:
- Click the virtual machines tab of the selected data center.
- Click on the three dots to the left of the VM name.
- In the drop-down list that opens, select Delete.
Telegram
Facebook
Instagram
Twitter